
Overview
The VR Studio (10R59), also referred to as the Recording Studio, is located on the first floor of the academic building in the northeast corner, near the Procedural Skills Room and elevators.
Among the various services available in the Recording Studio is a purpose-built cart to facilitate lecture, voice, and video capture. This cart has pre-configured lights and microphones and can be reserved for use by Faculty, Students, and Staff through the Office of Medical Education.
The article below will walk you through:
- Connecting to the cart using an Apple laptop (14" MacBook Pro)
- Capturing your content
- Uploading to Panopto
- Troubleshooting some less complex issues you may encounter.
Getting Started
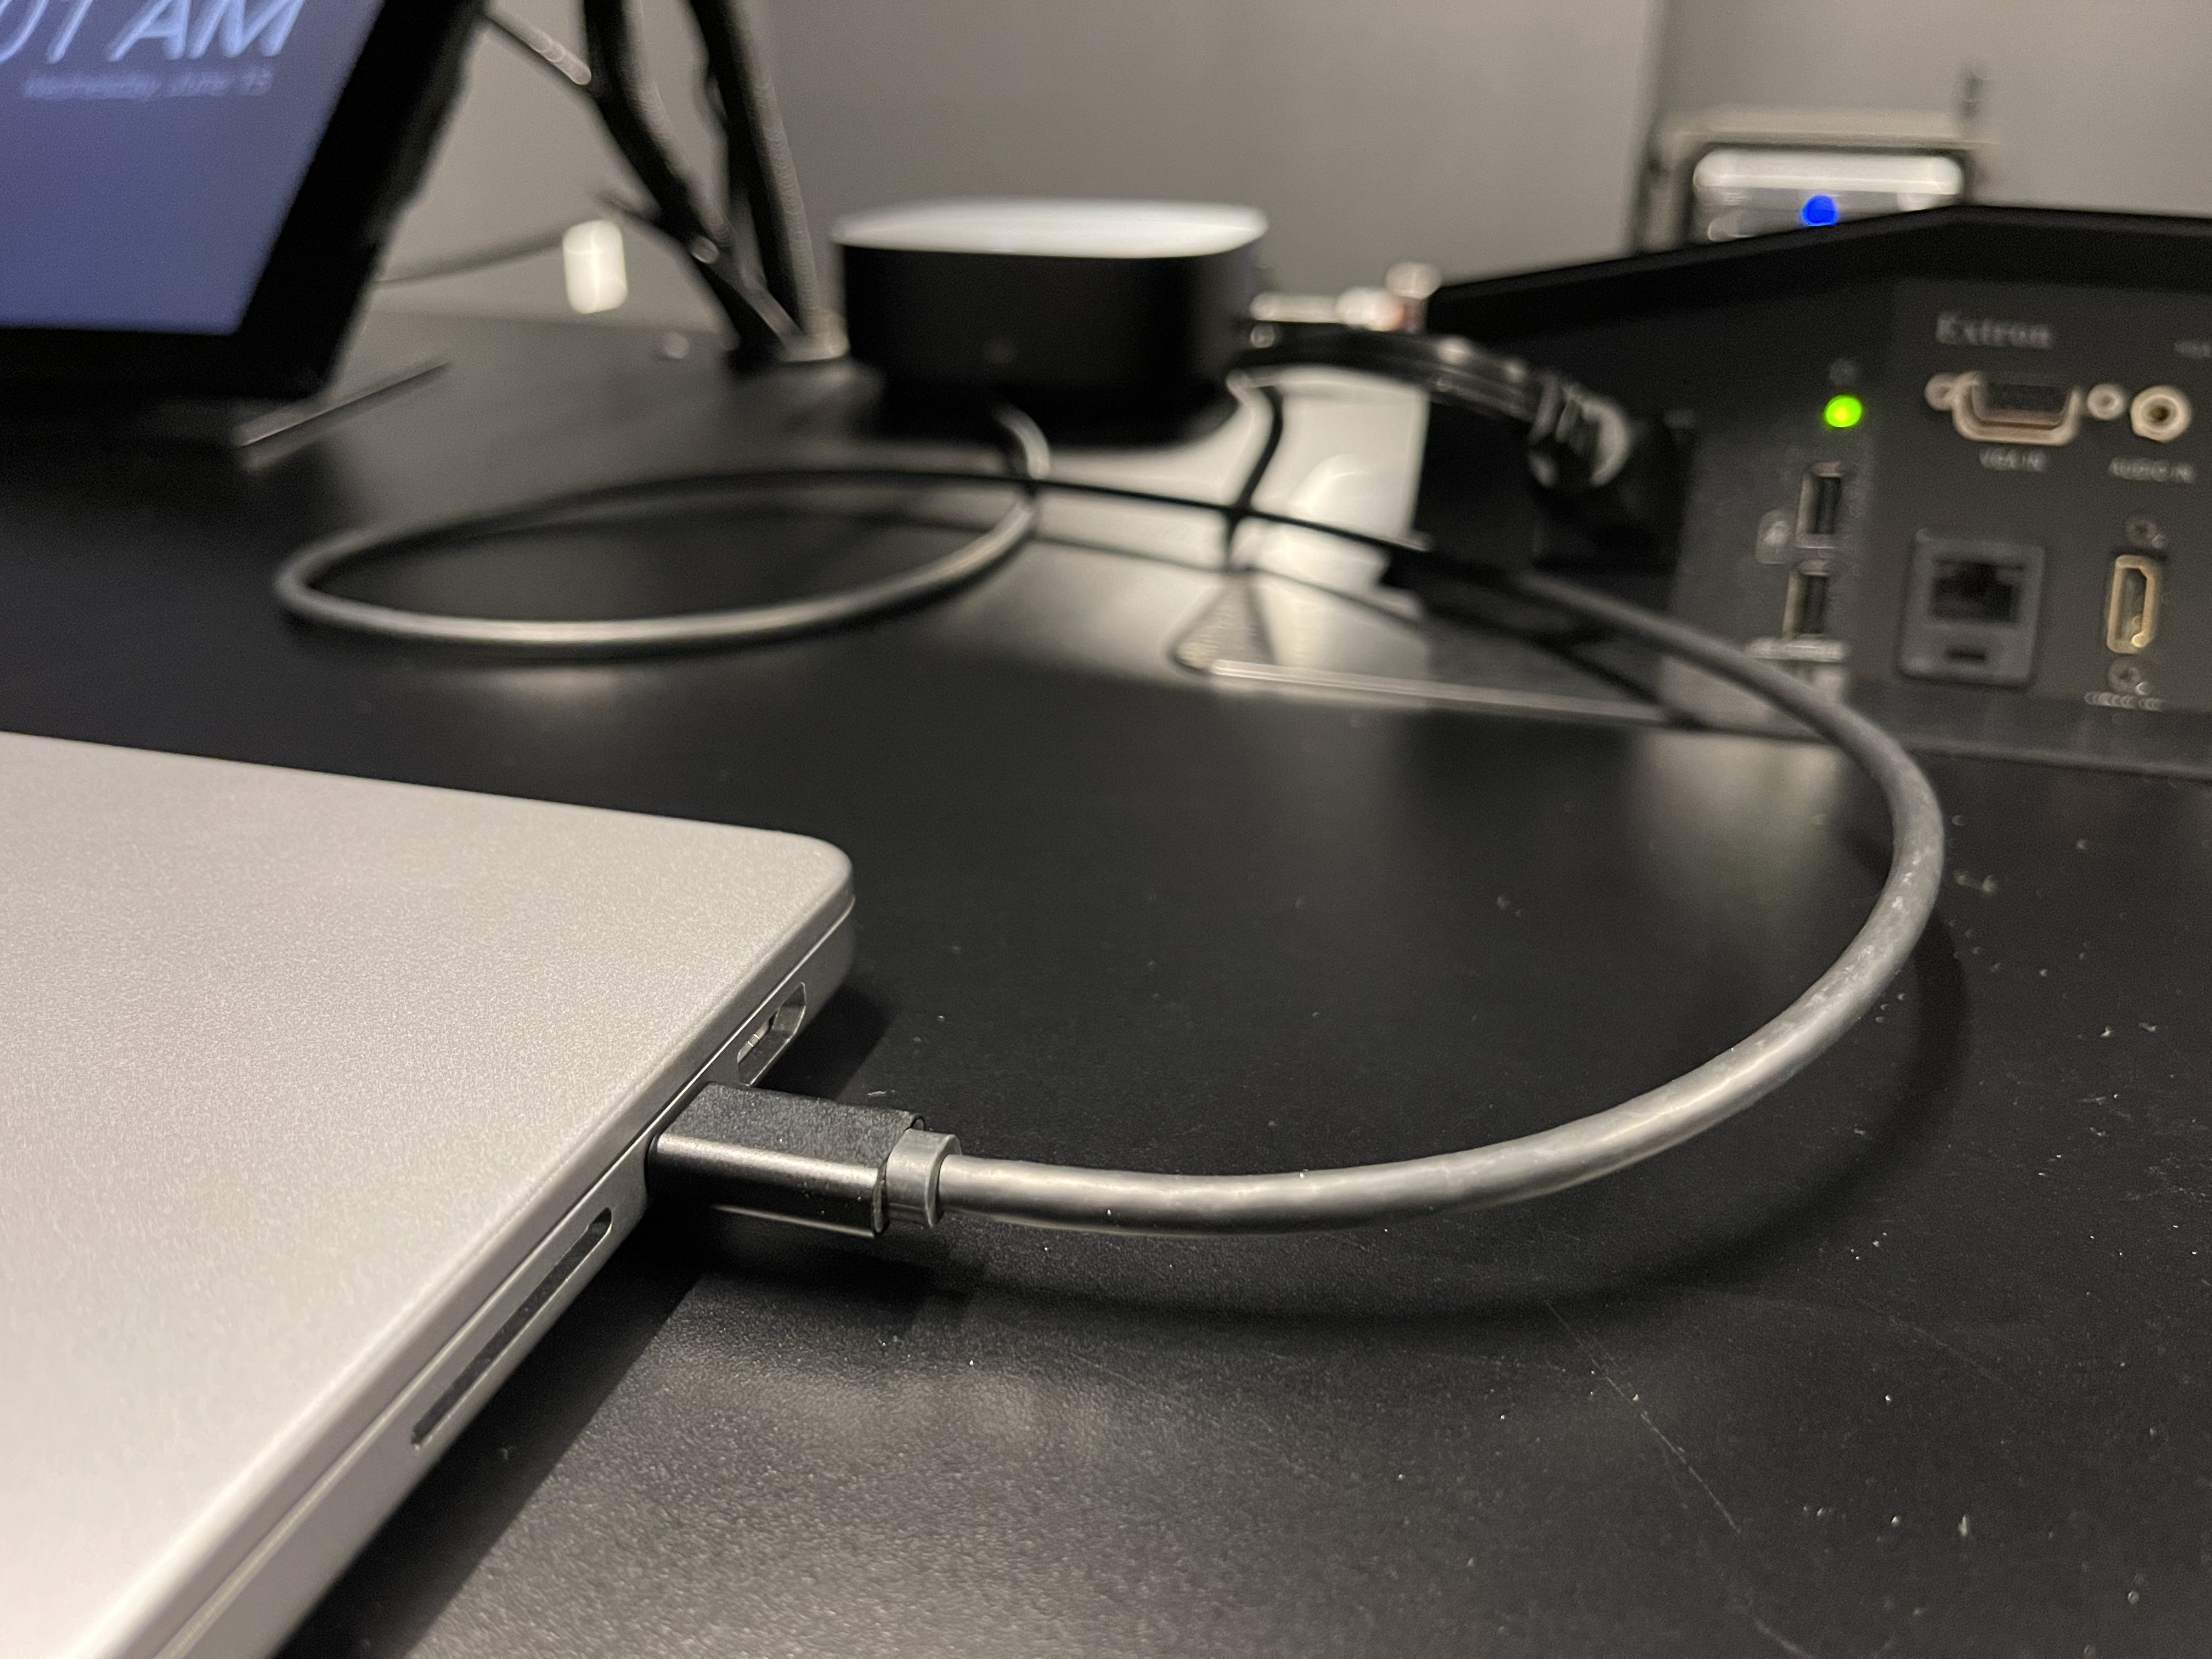
Step 1 - Plug your laptop into the USB-C dock.
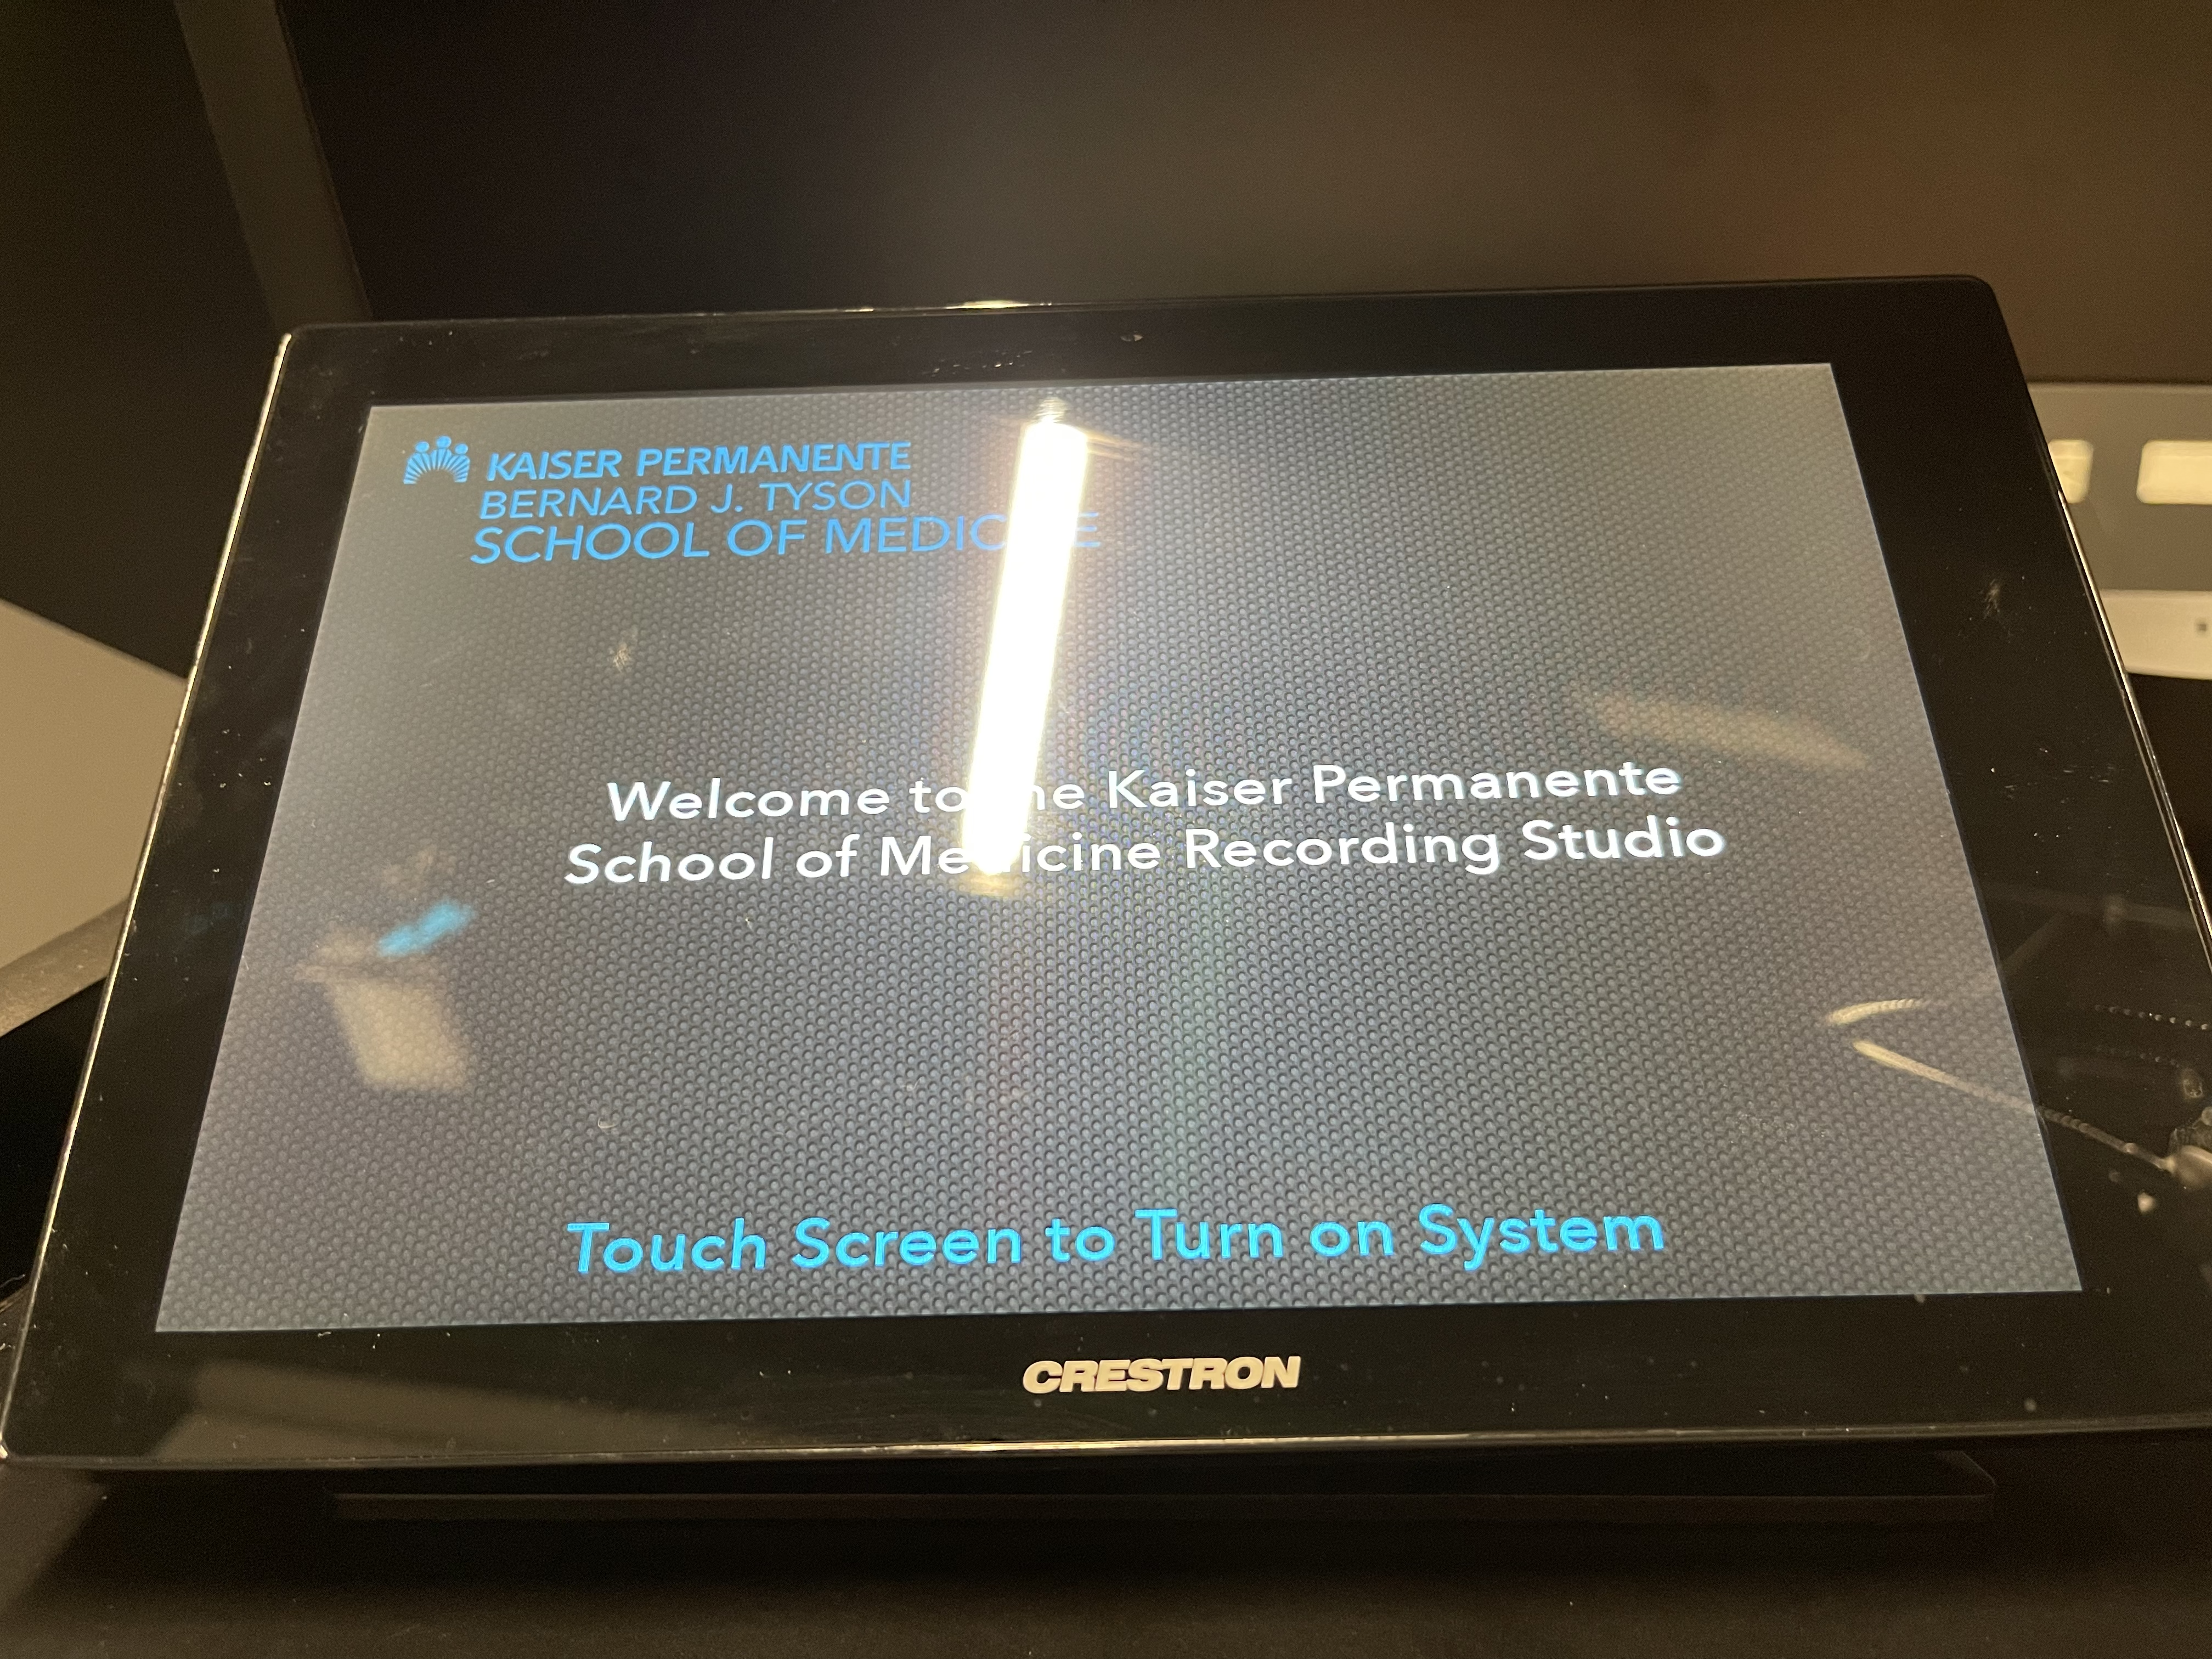
Step 2 - Tap the Crestron screen to start
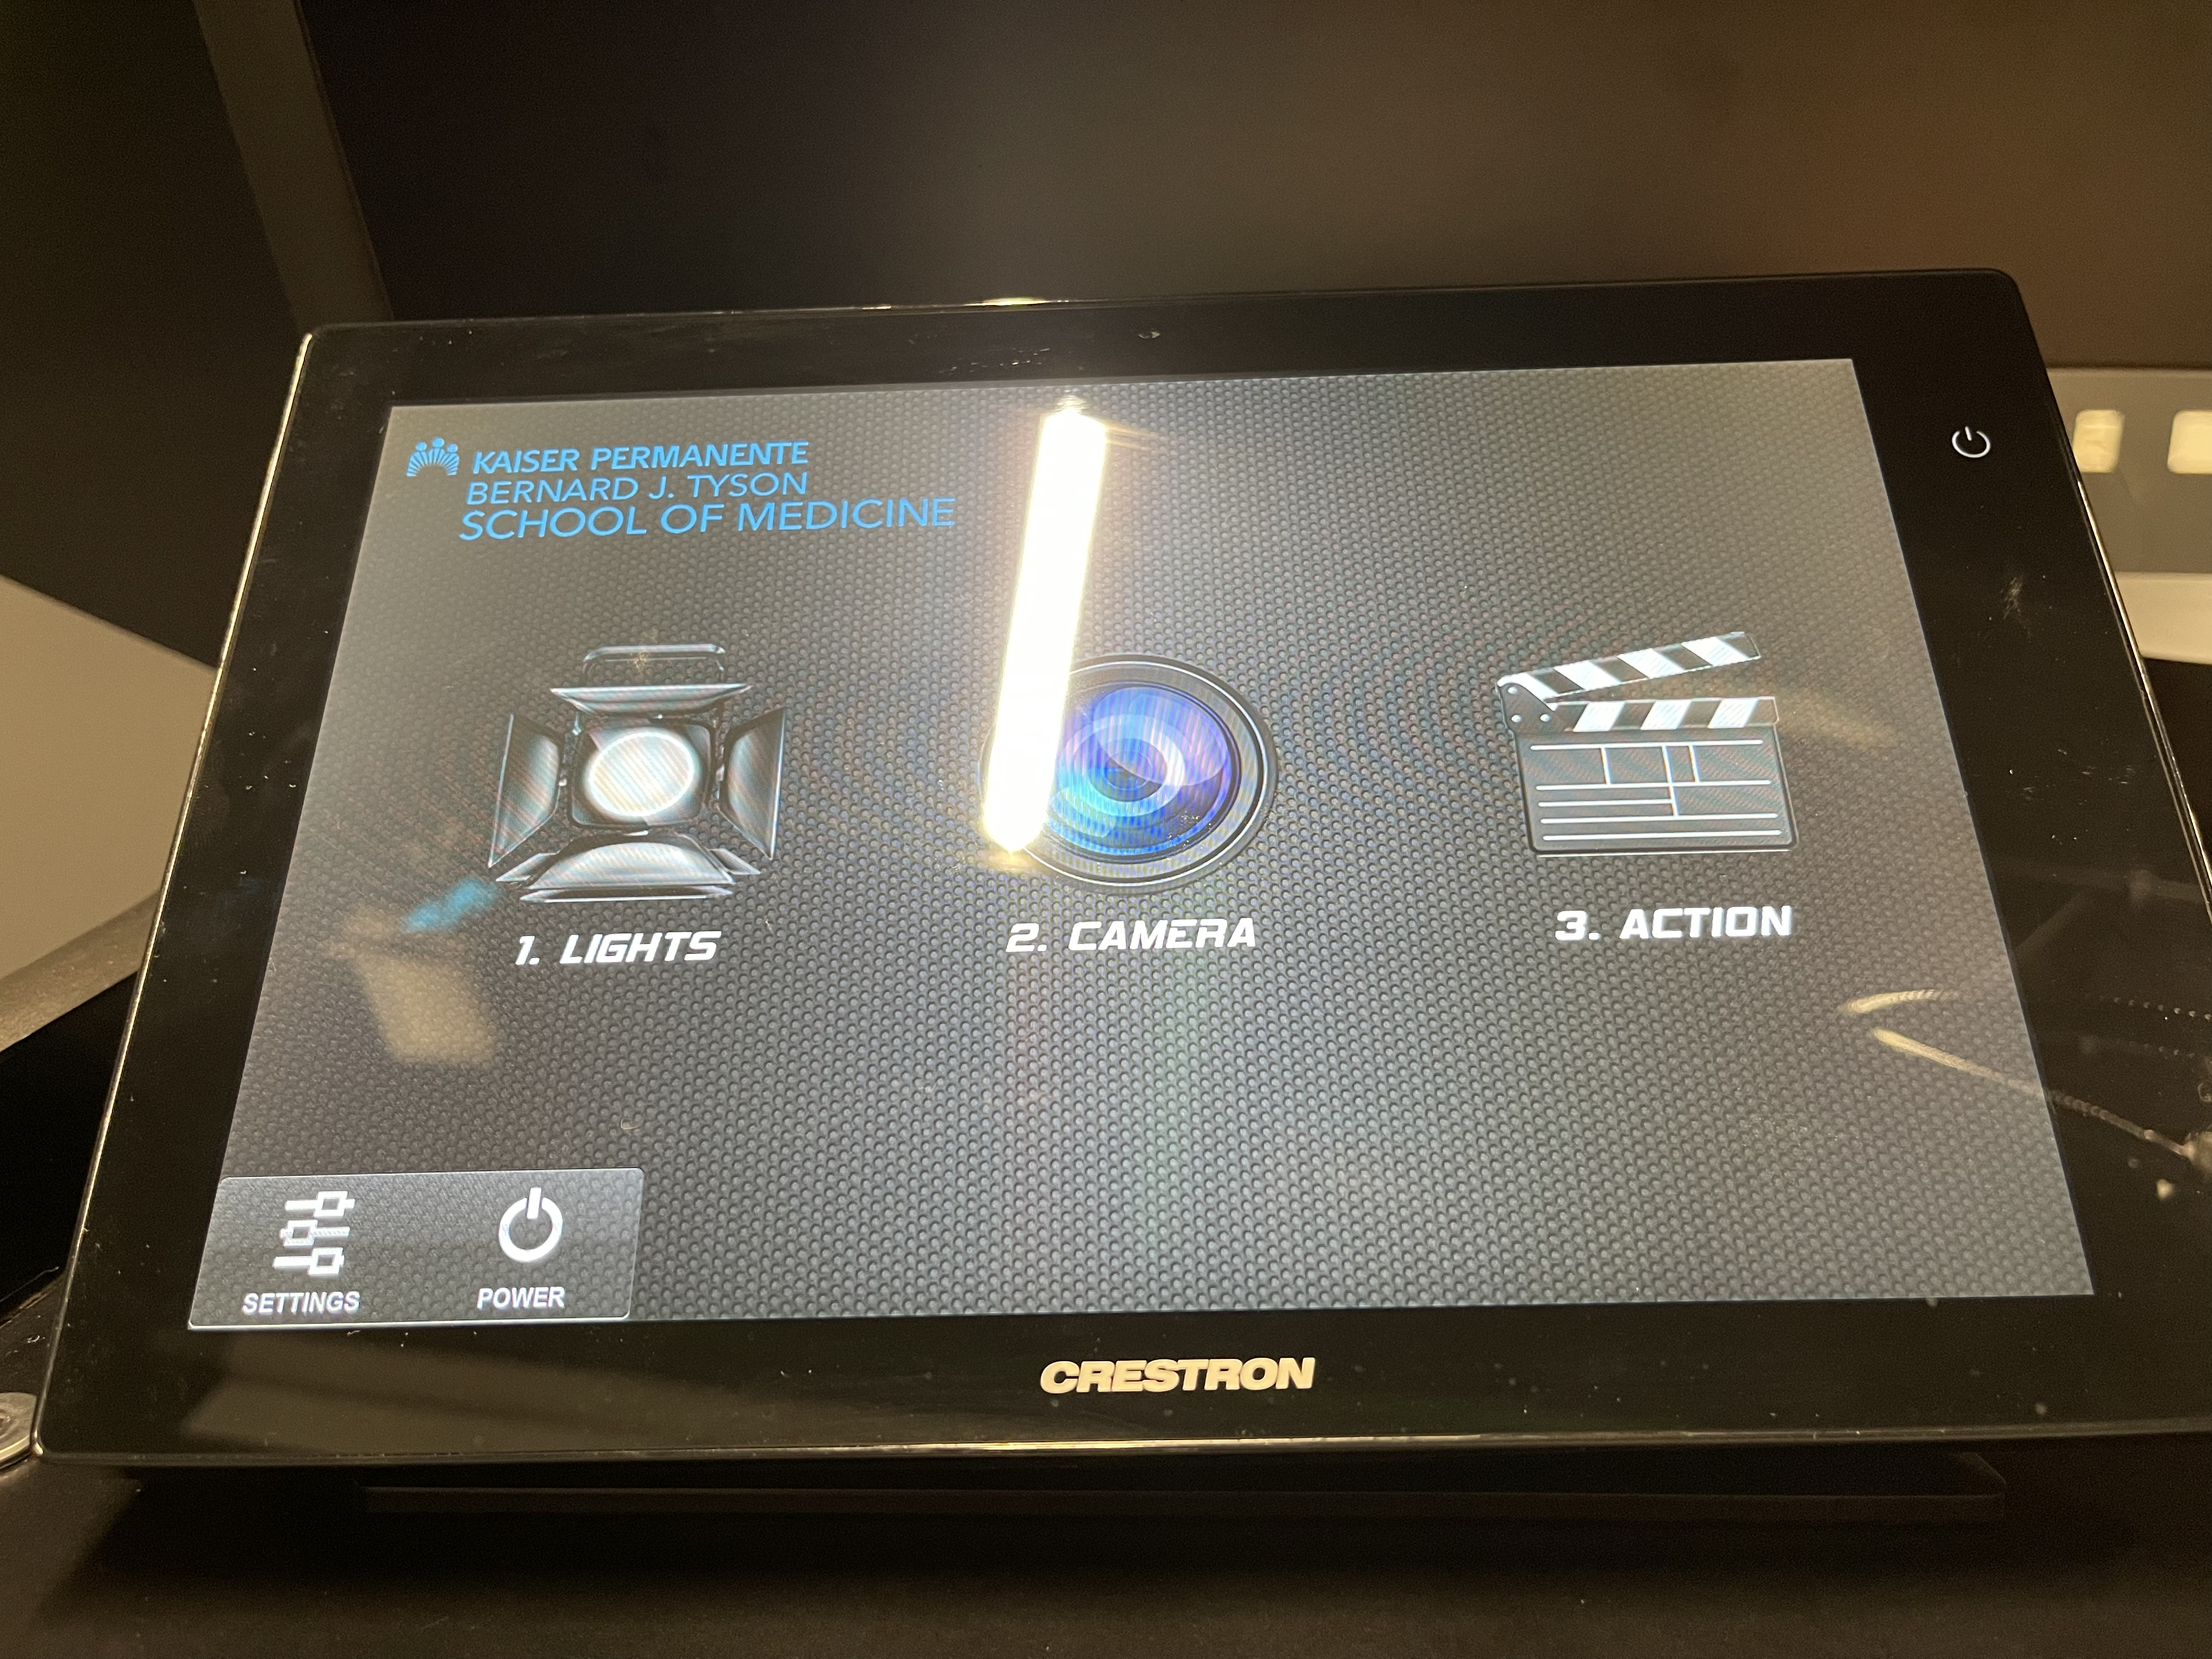
Step 3 - Tap the Lights button
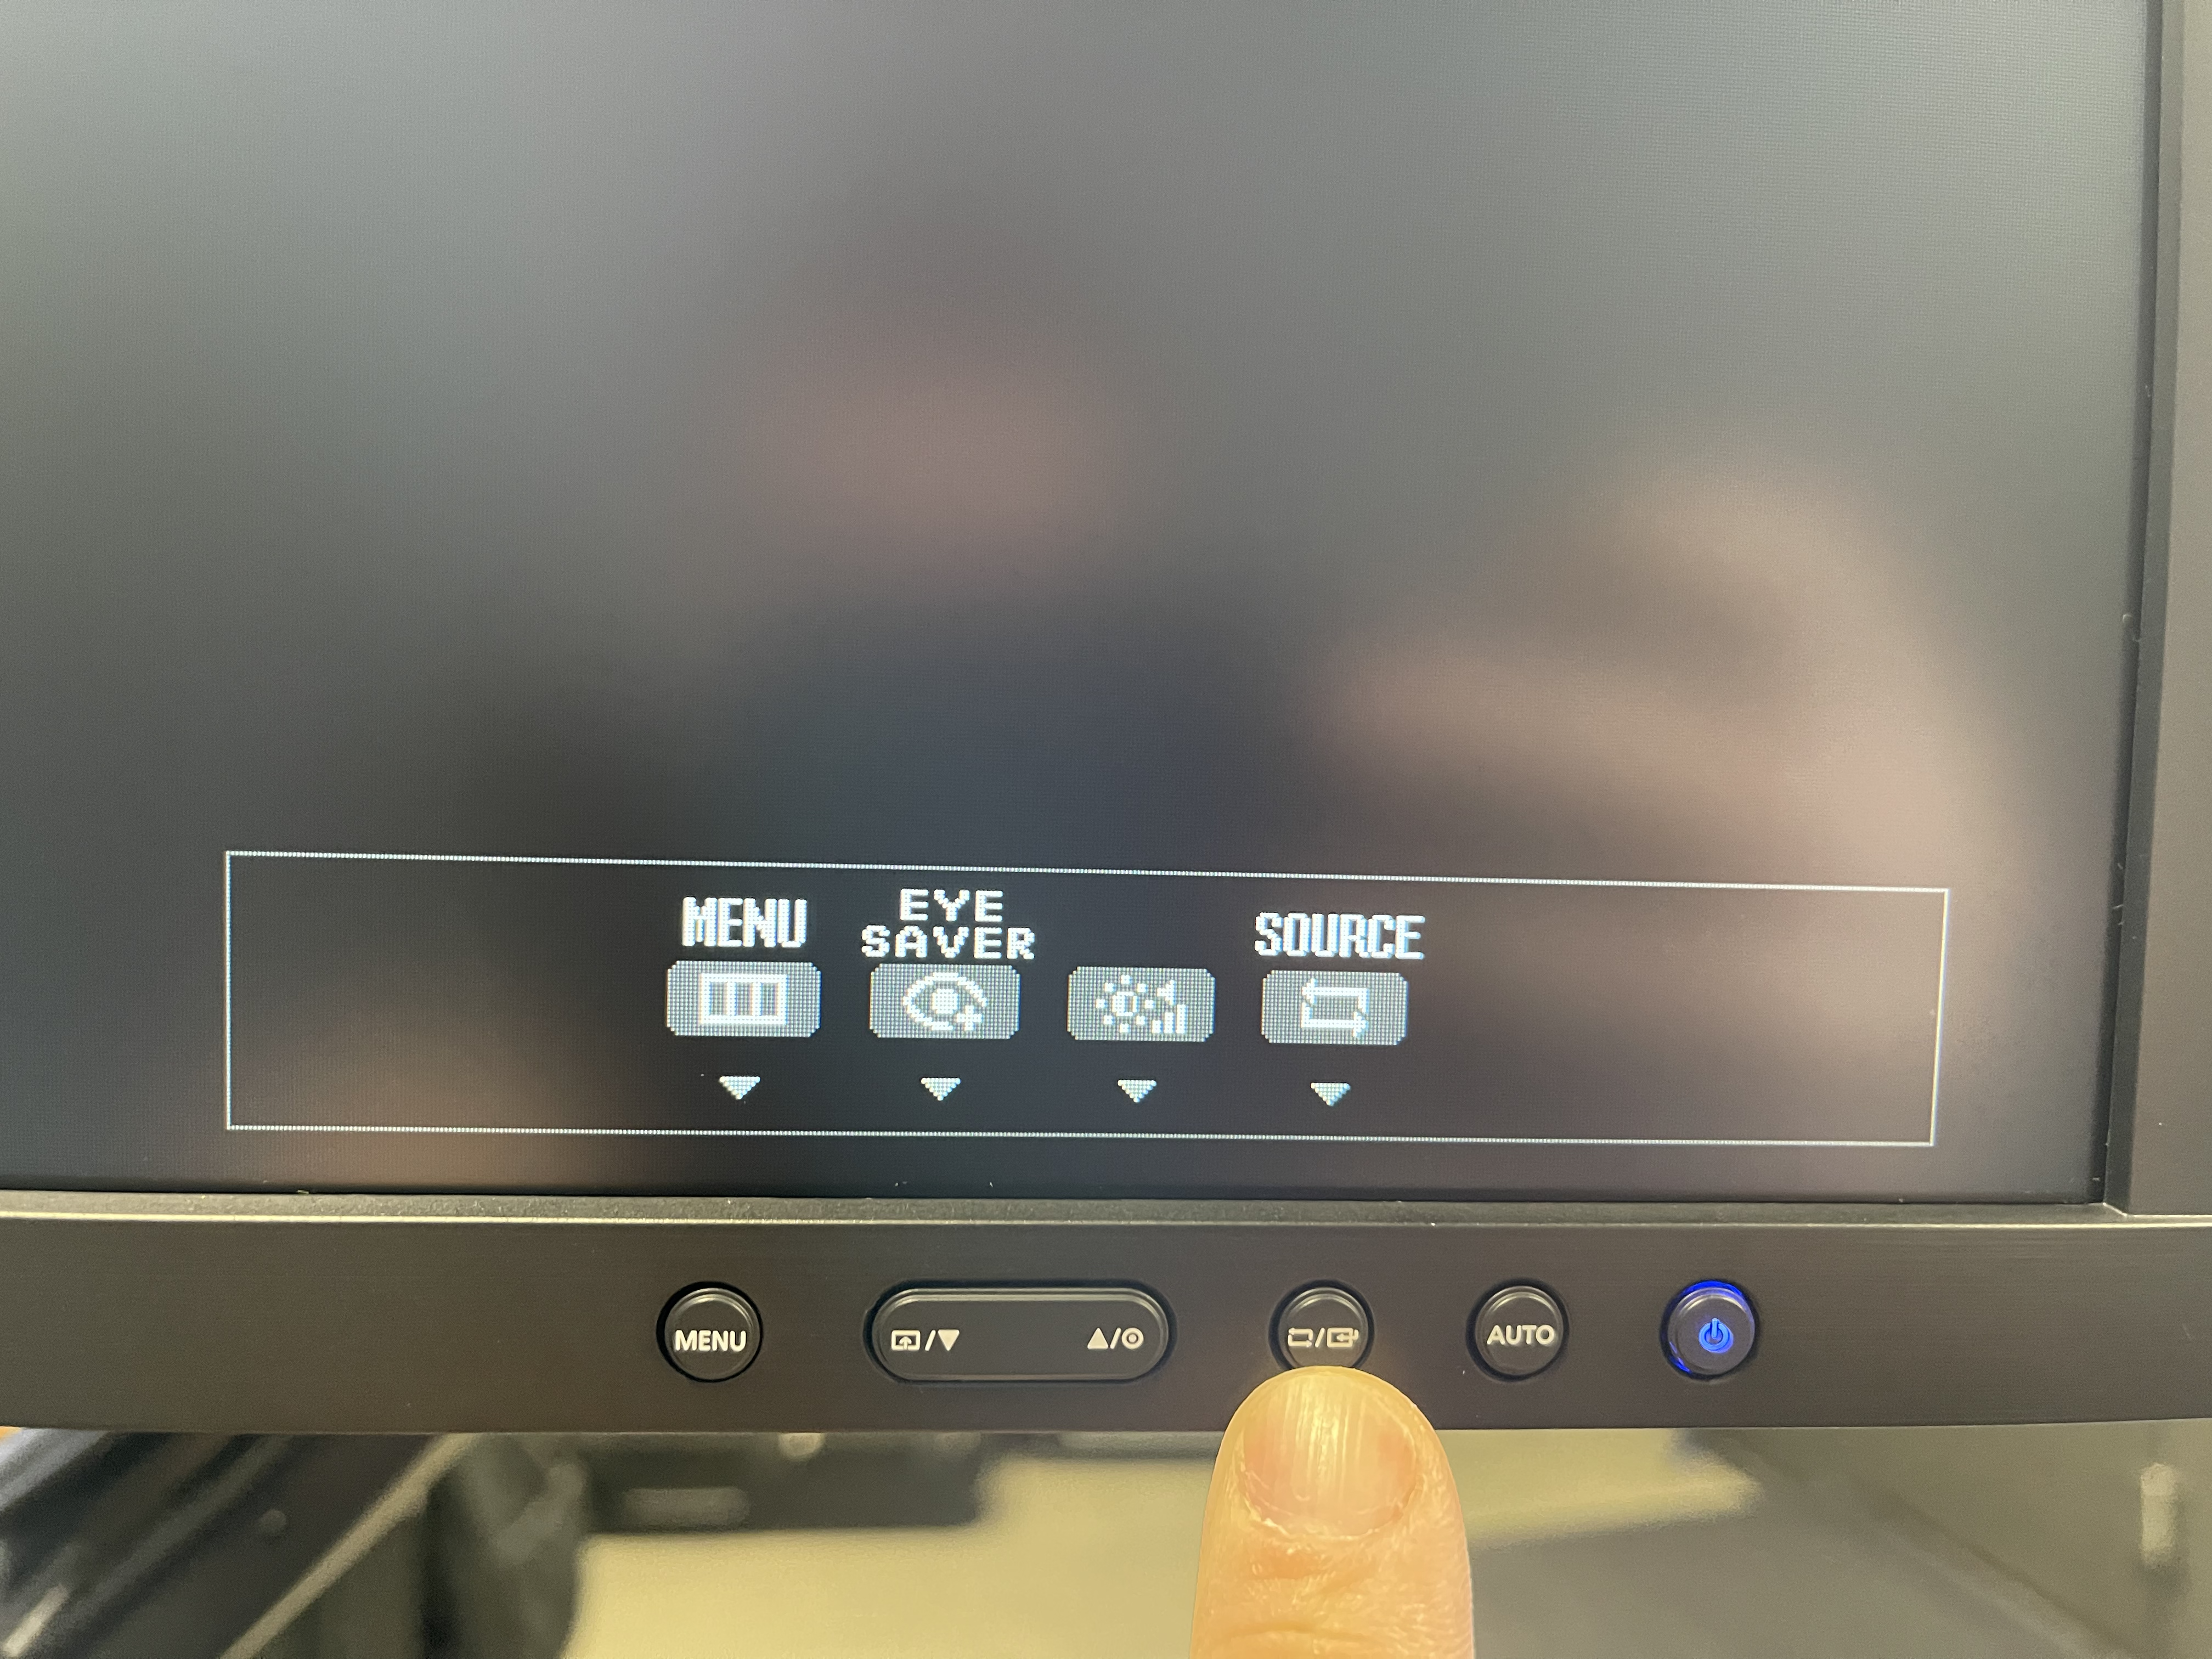
Step 4 - If you don’t automatically see your screen change the monitor source to Display Port
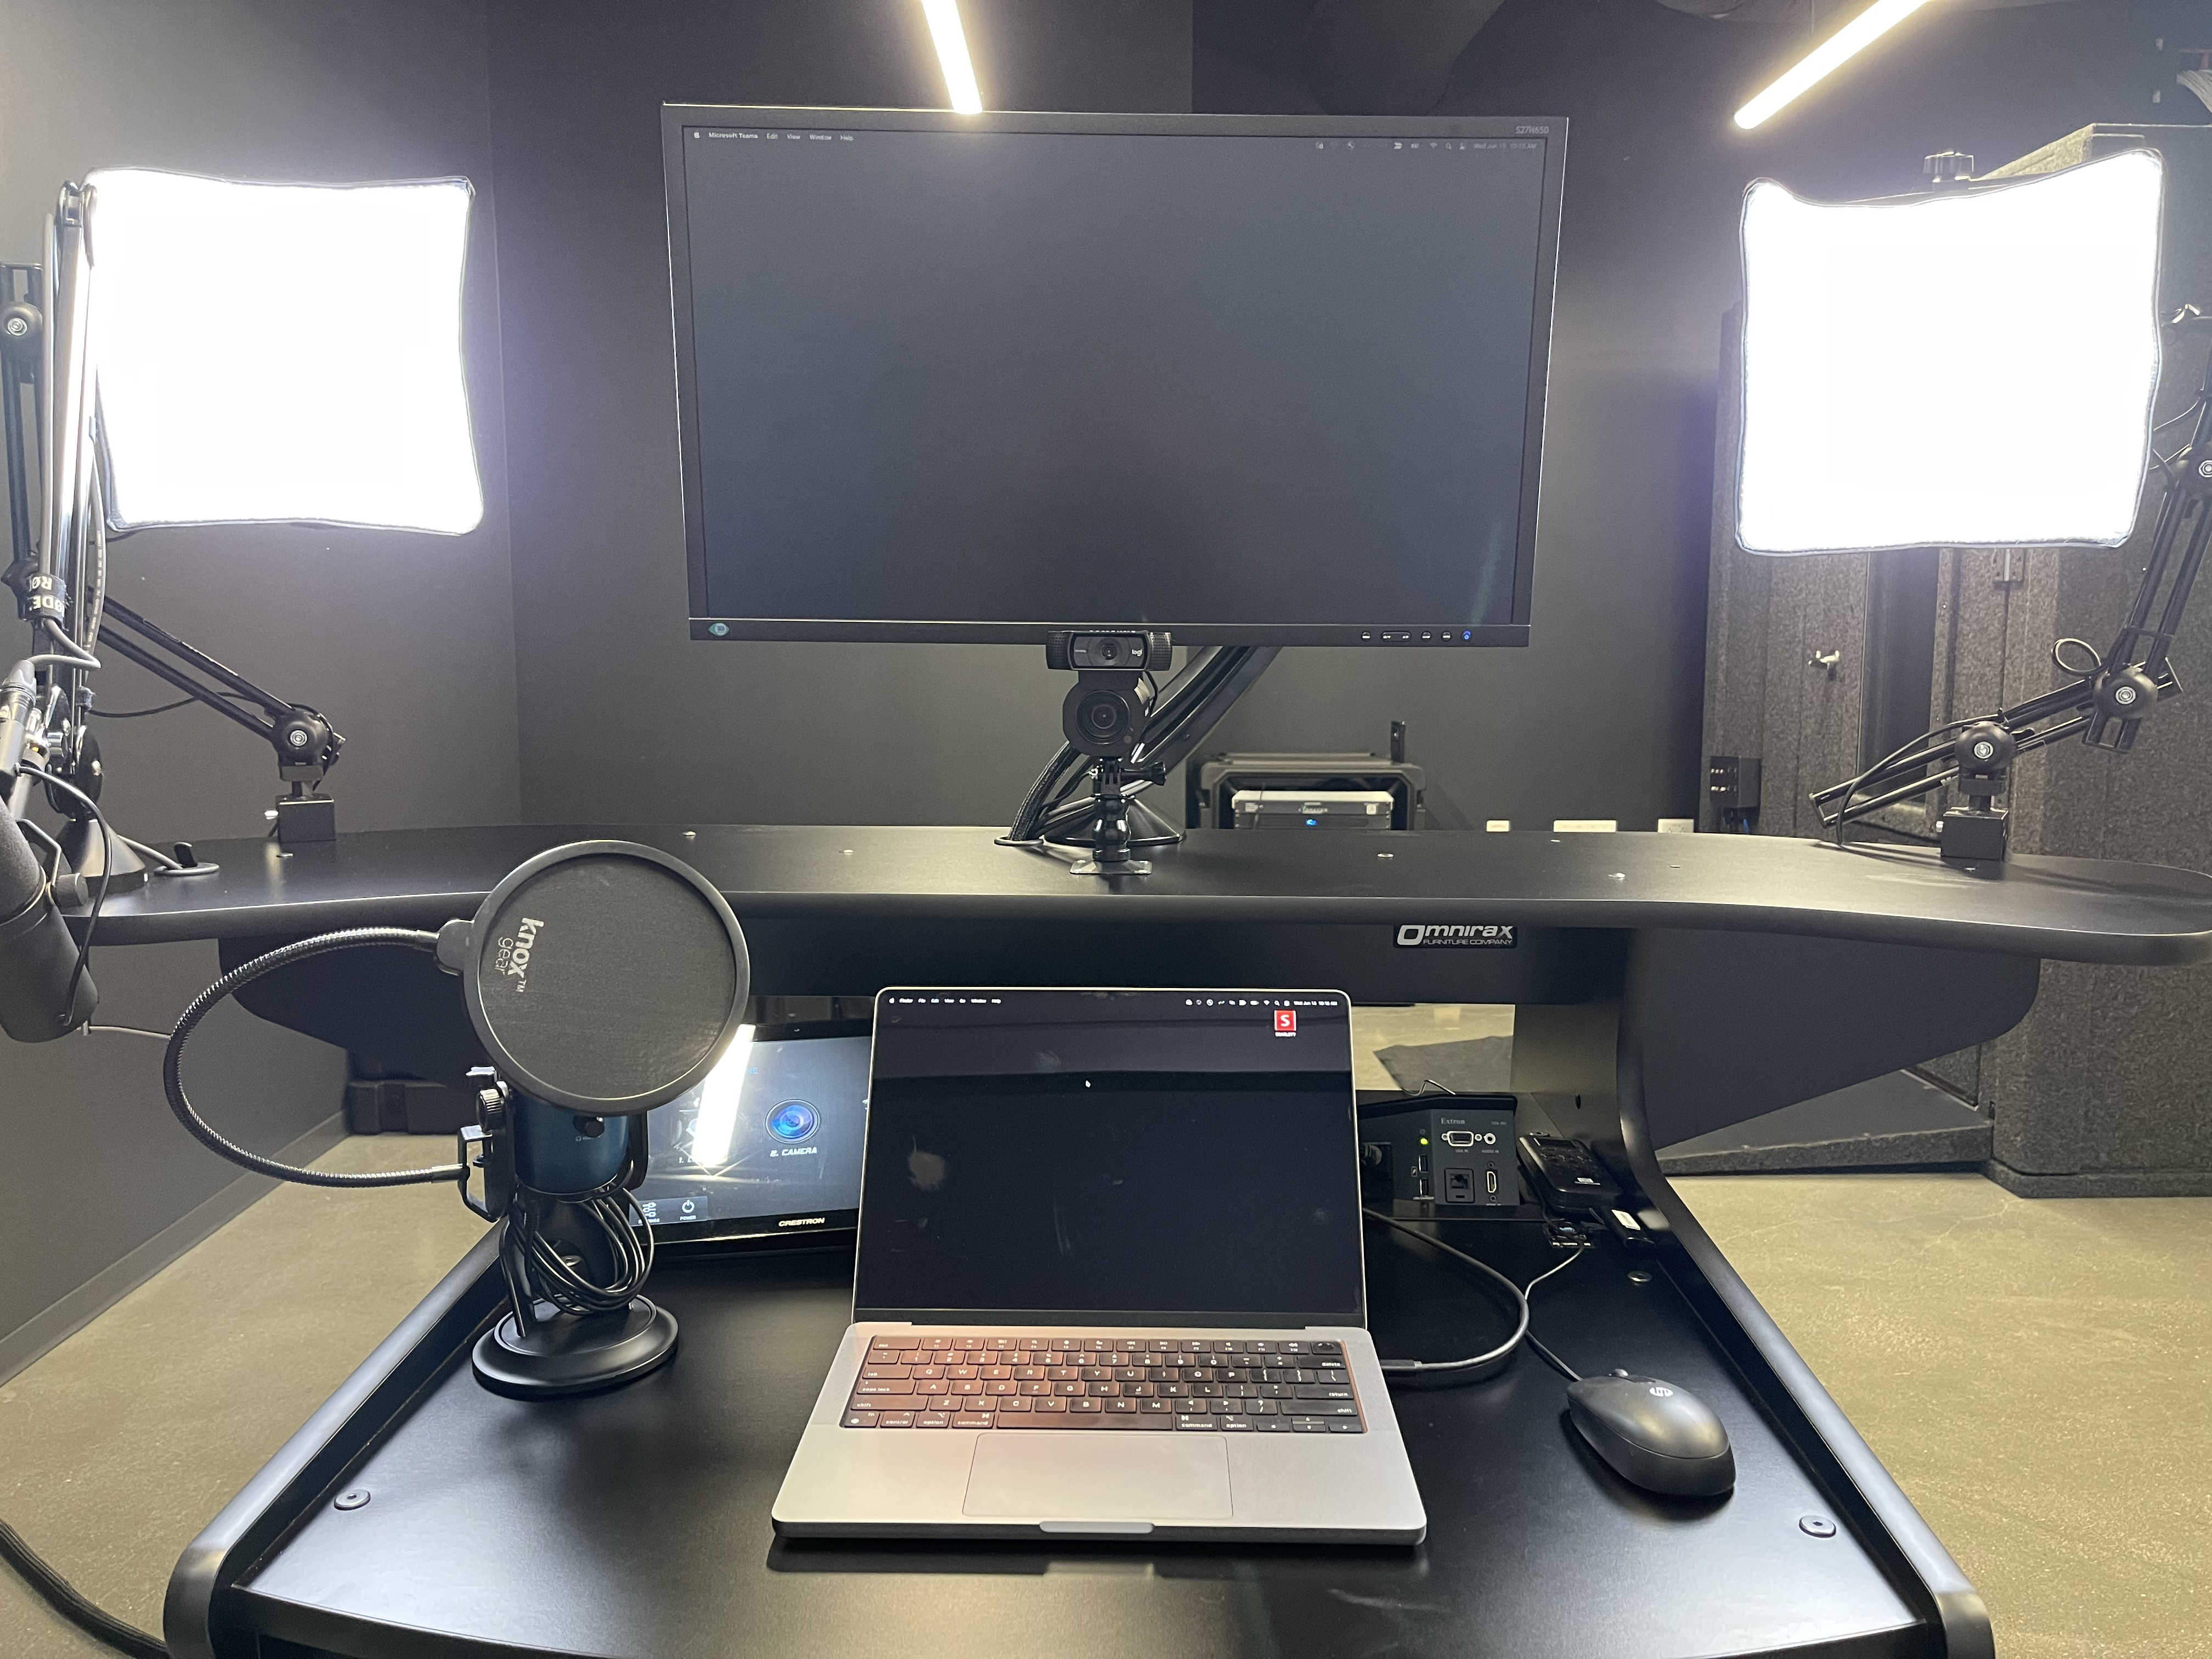
Step 5 - Once the correct source is selected, the desk should look similar to this.
(In this example, the laptop has a black background, but the screen is being properly mirrored to the larger screen above)
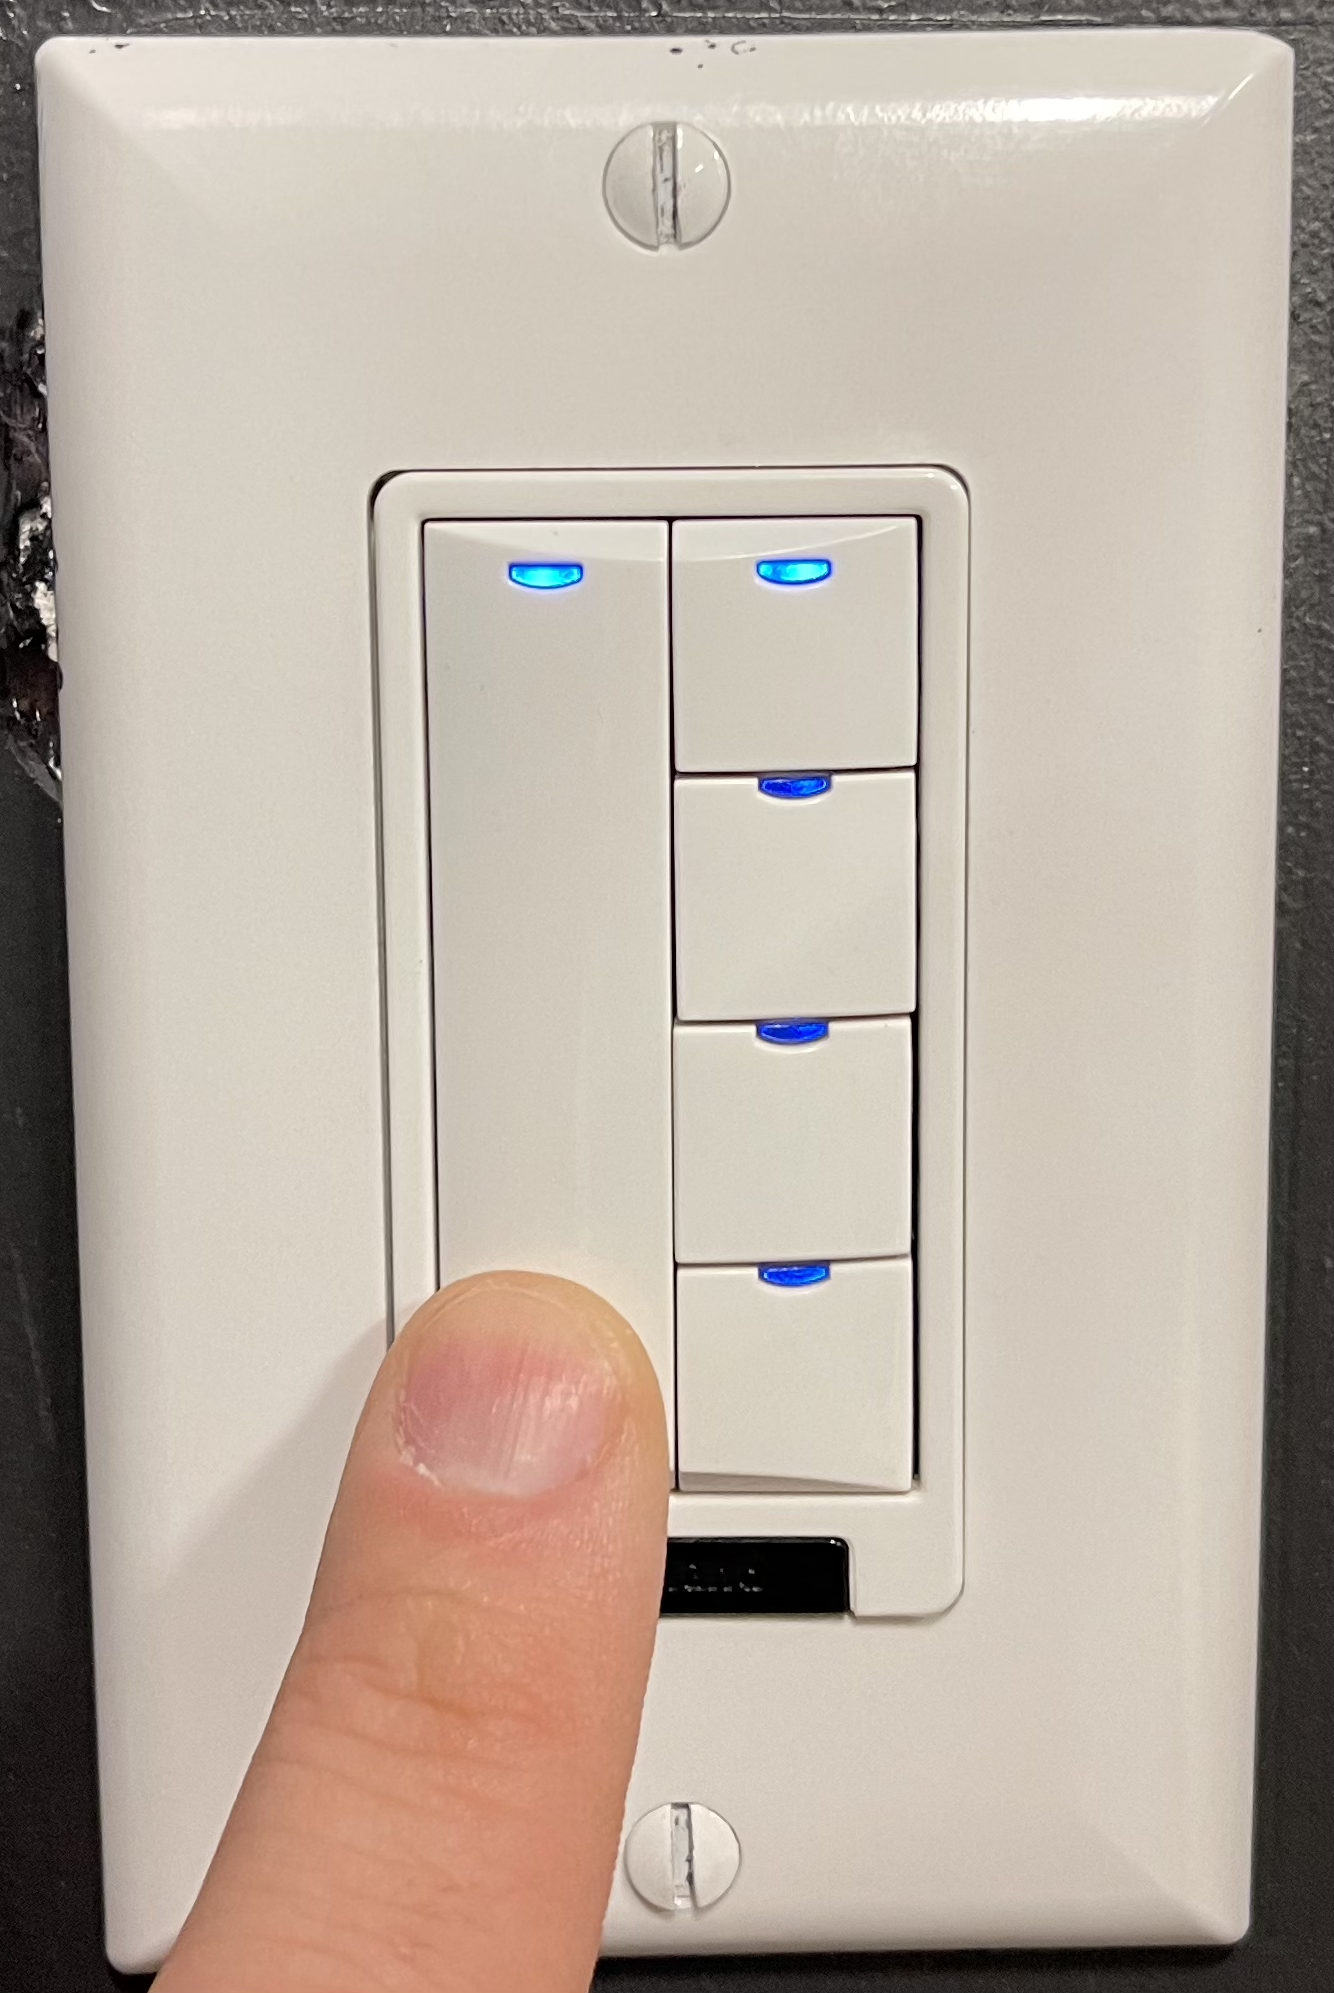
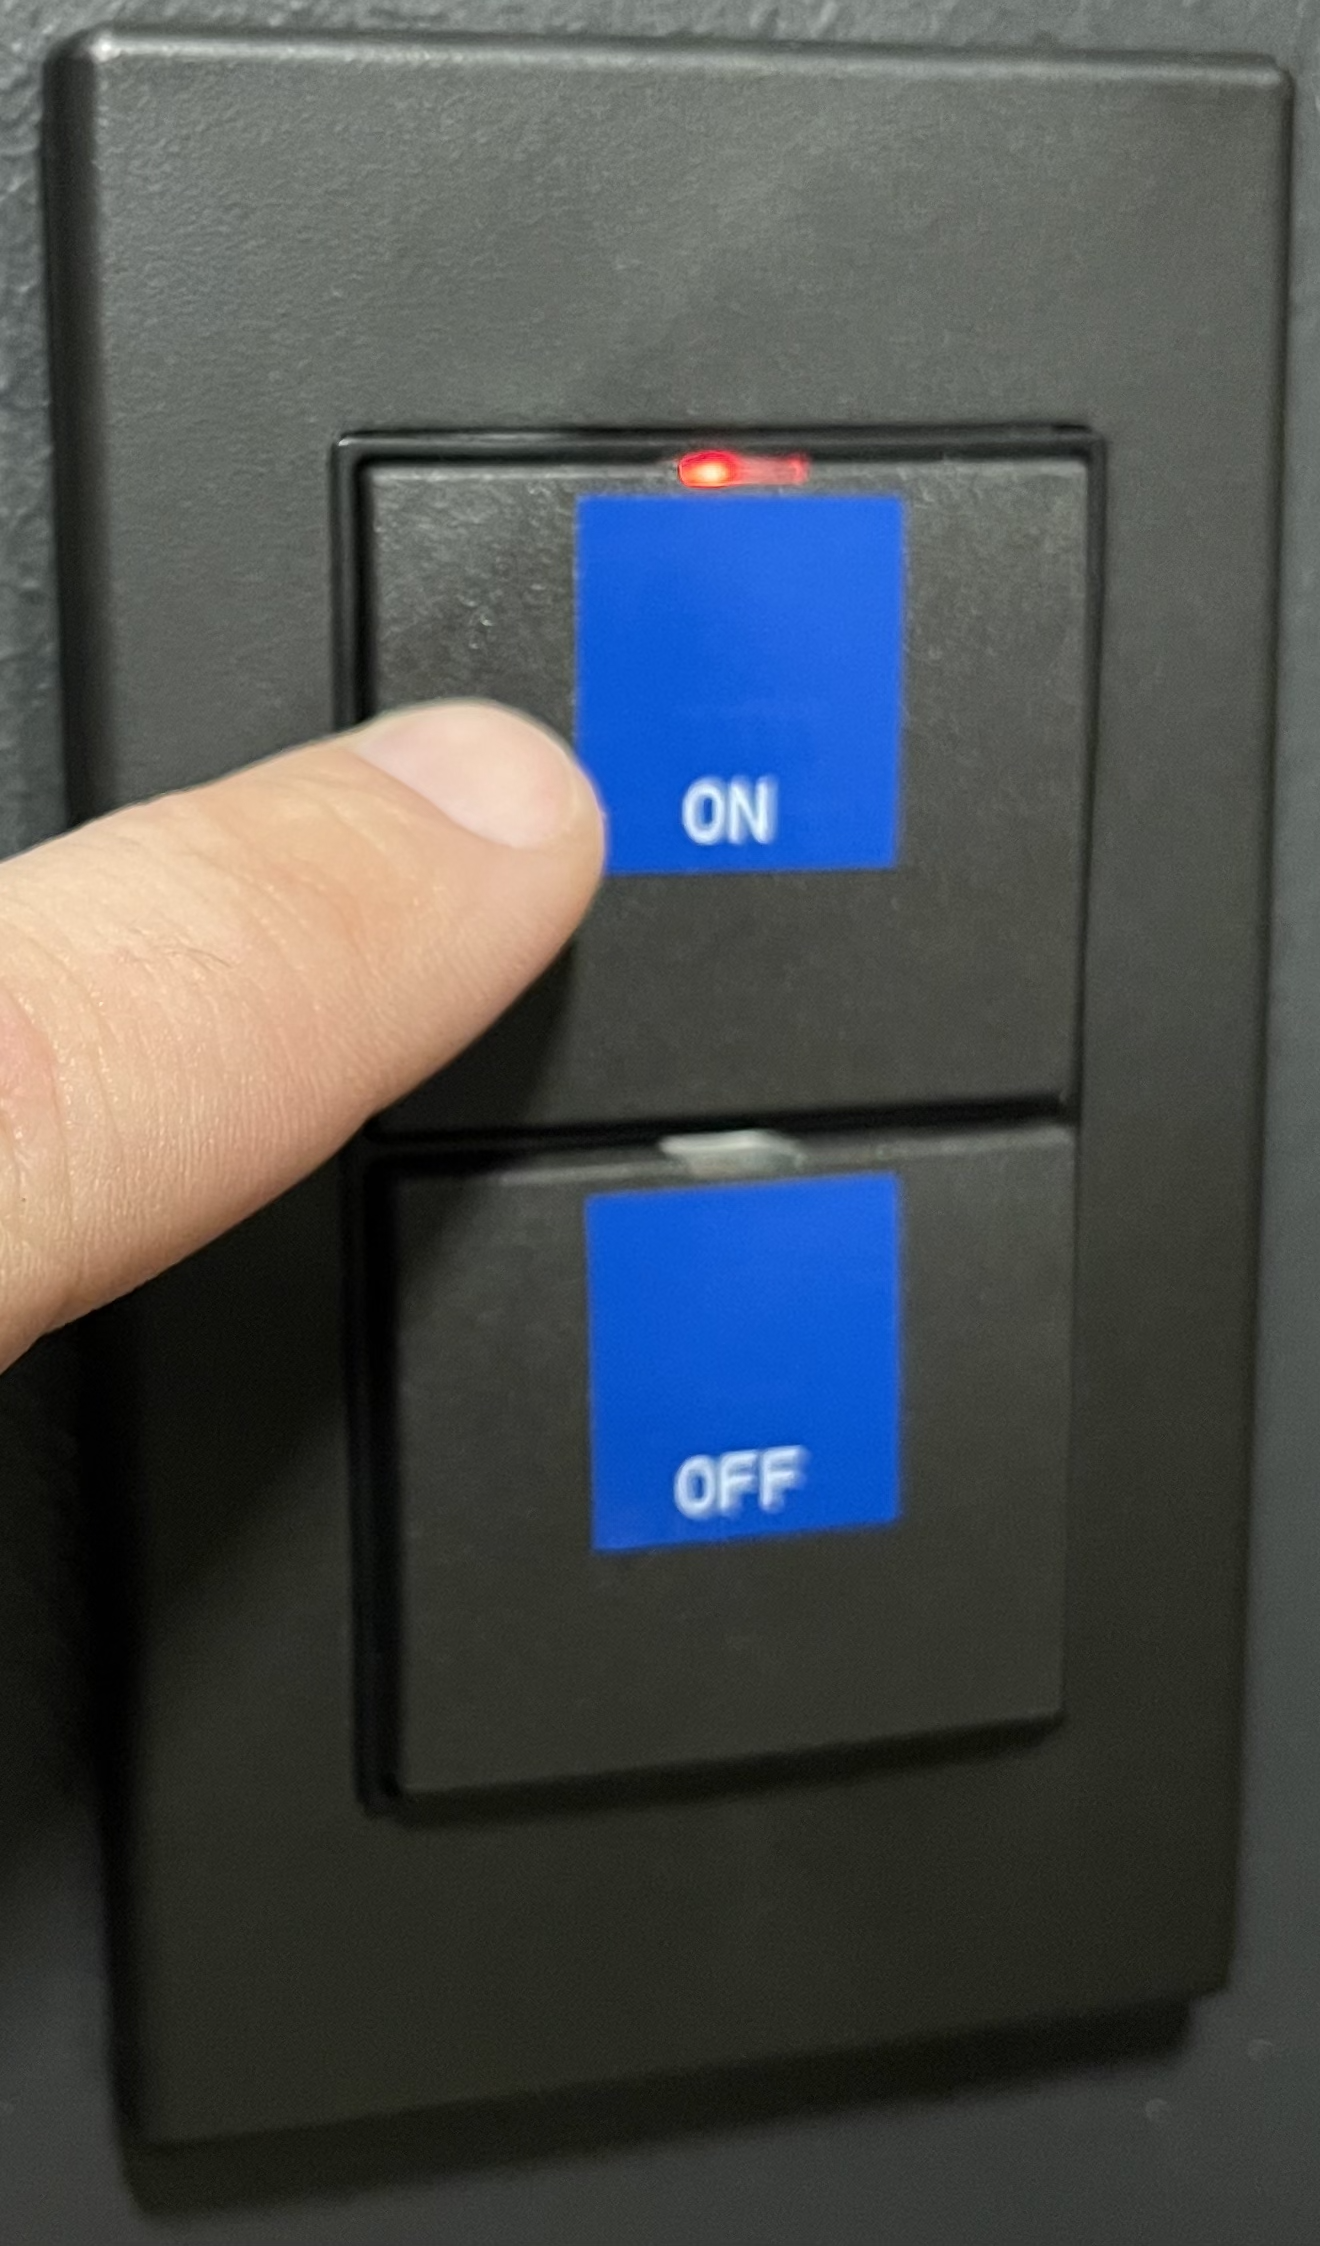
Step 6 - Turn off the ceiling lights using the white switch by the door. Turn on the On Air light (located on the outside of the room) using the black switch.
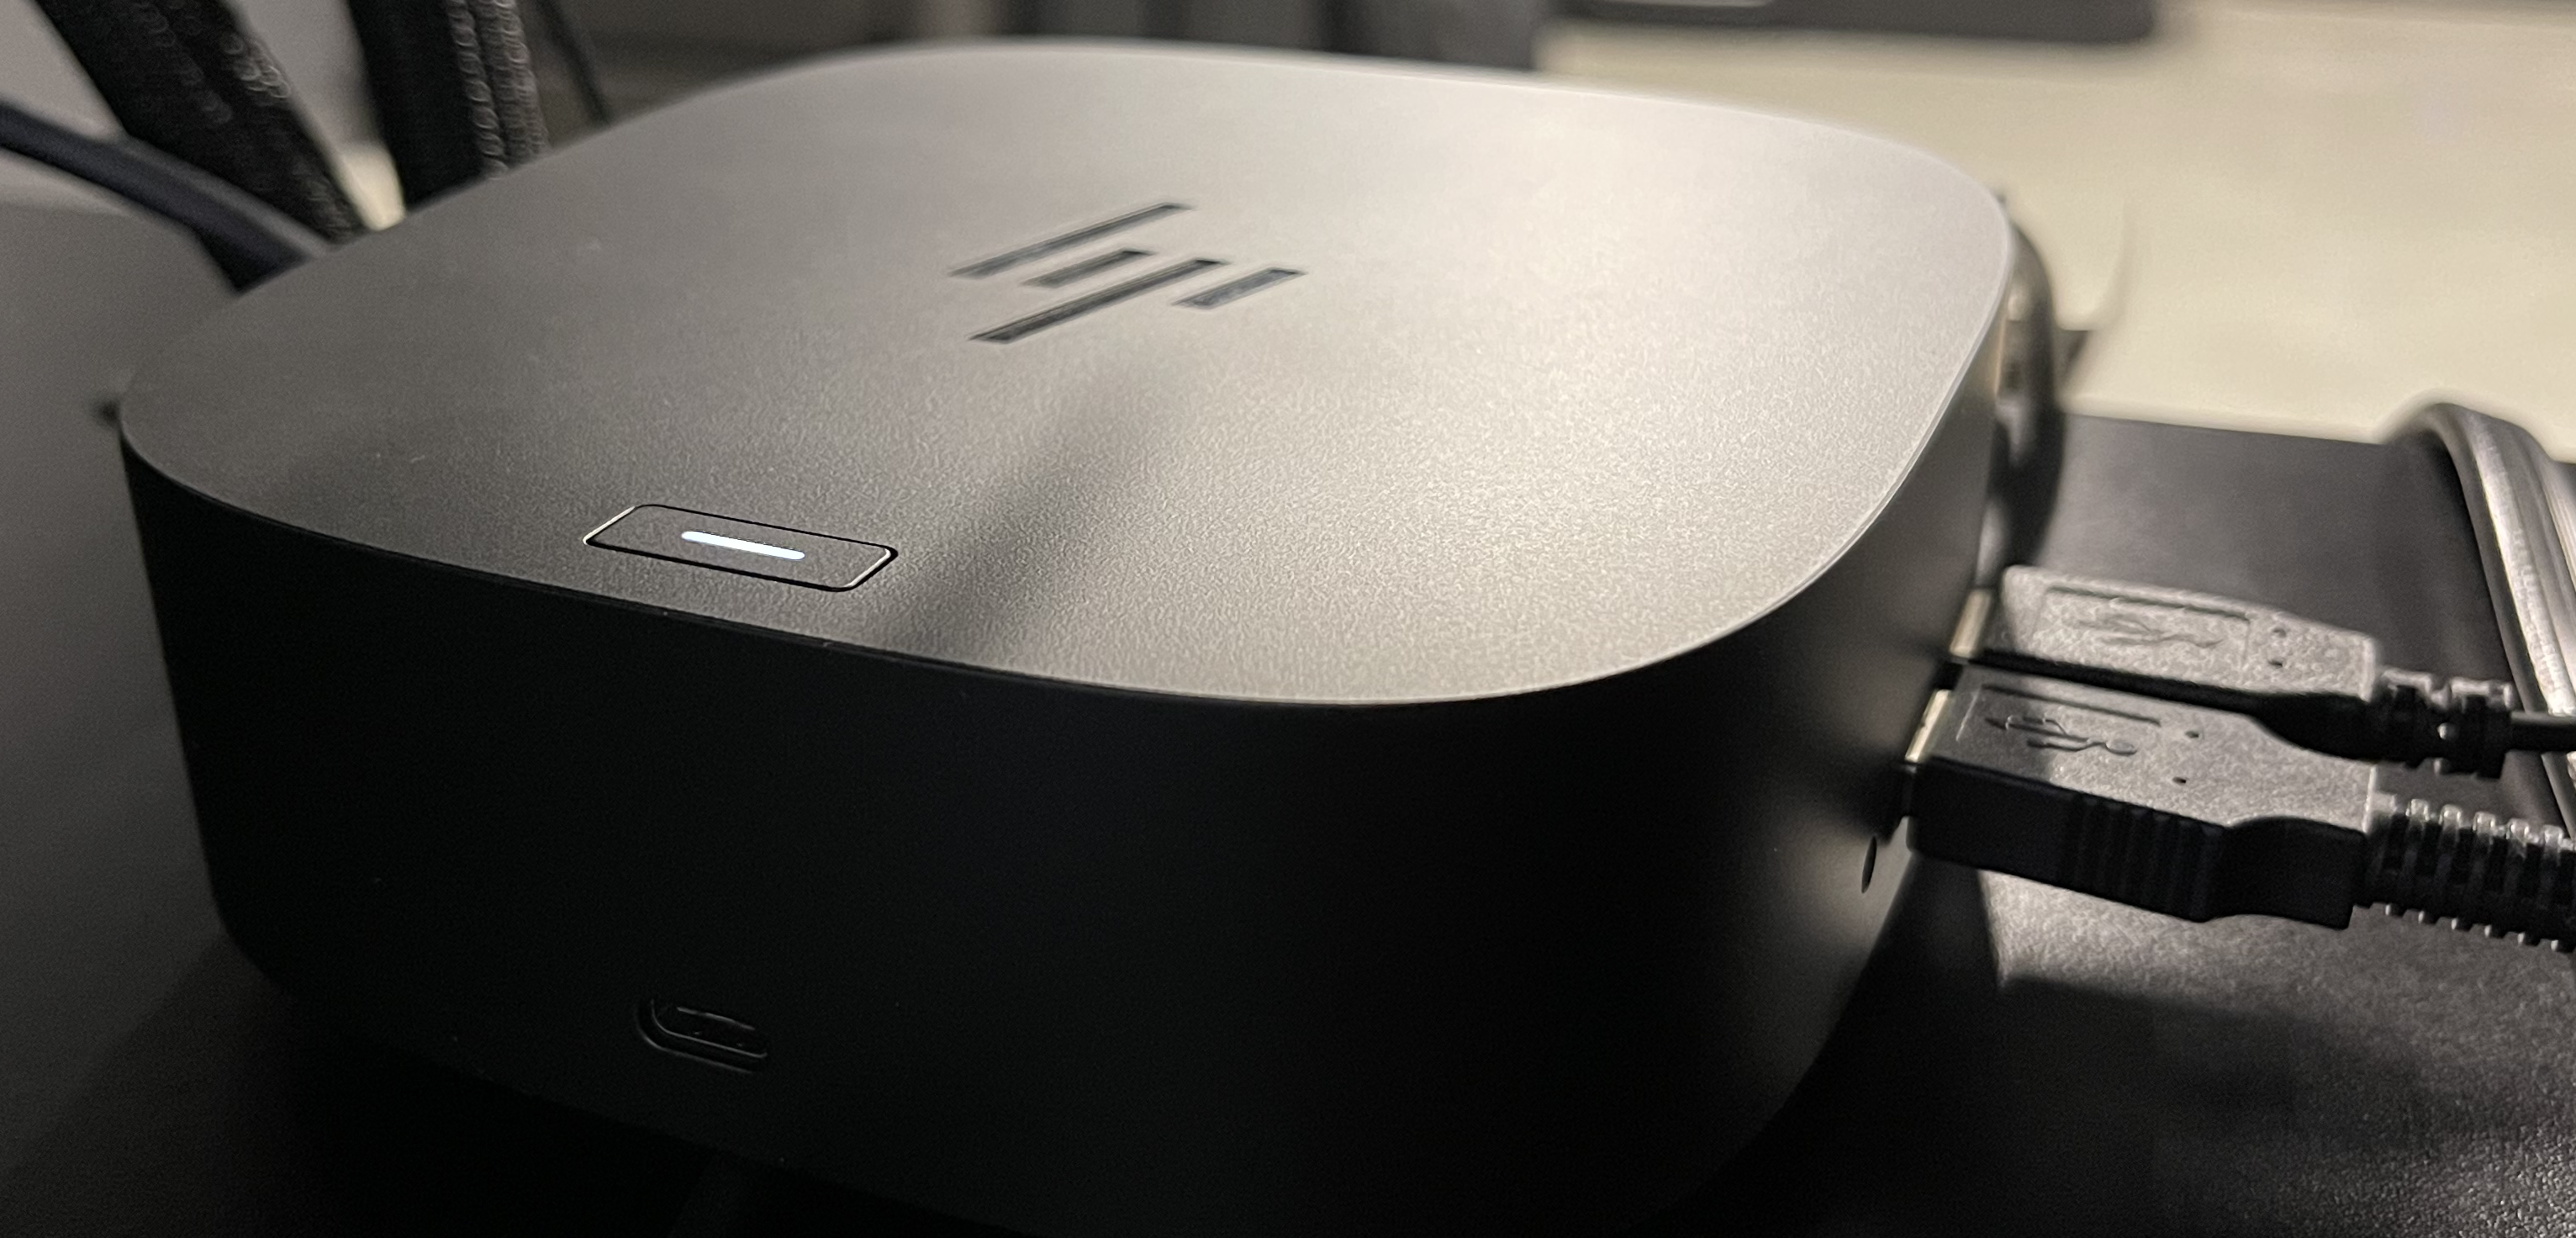
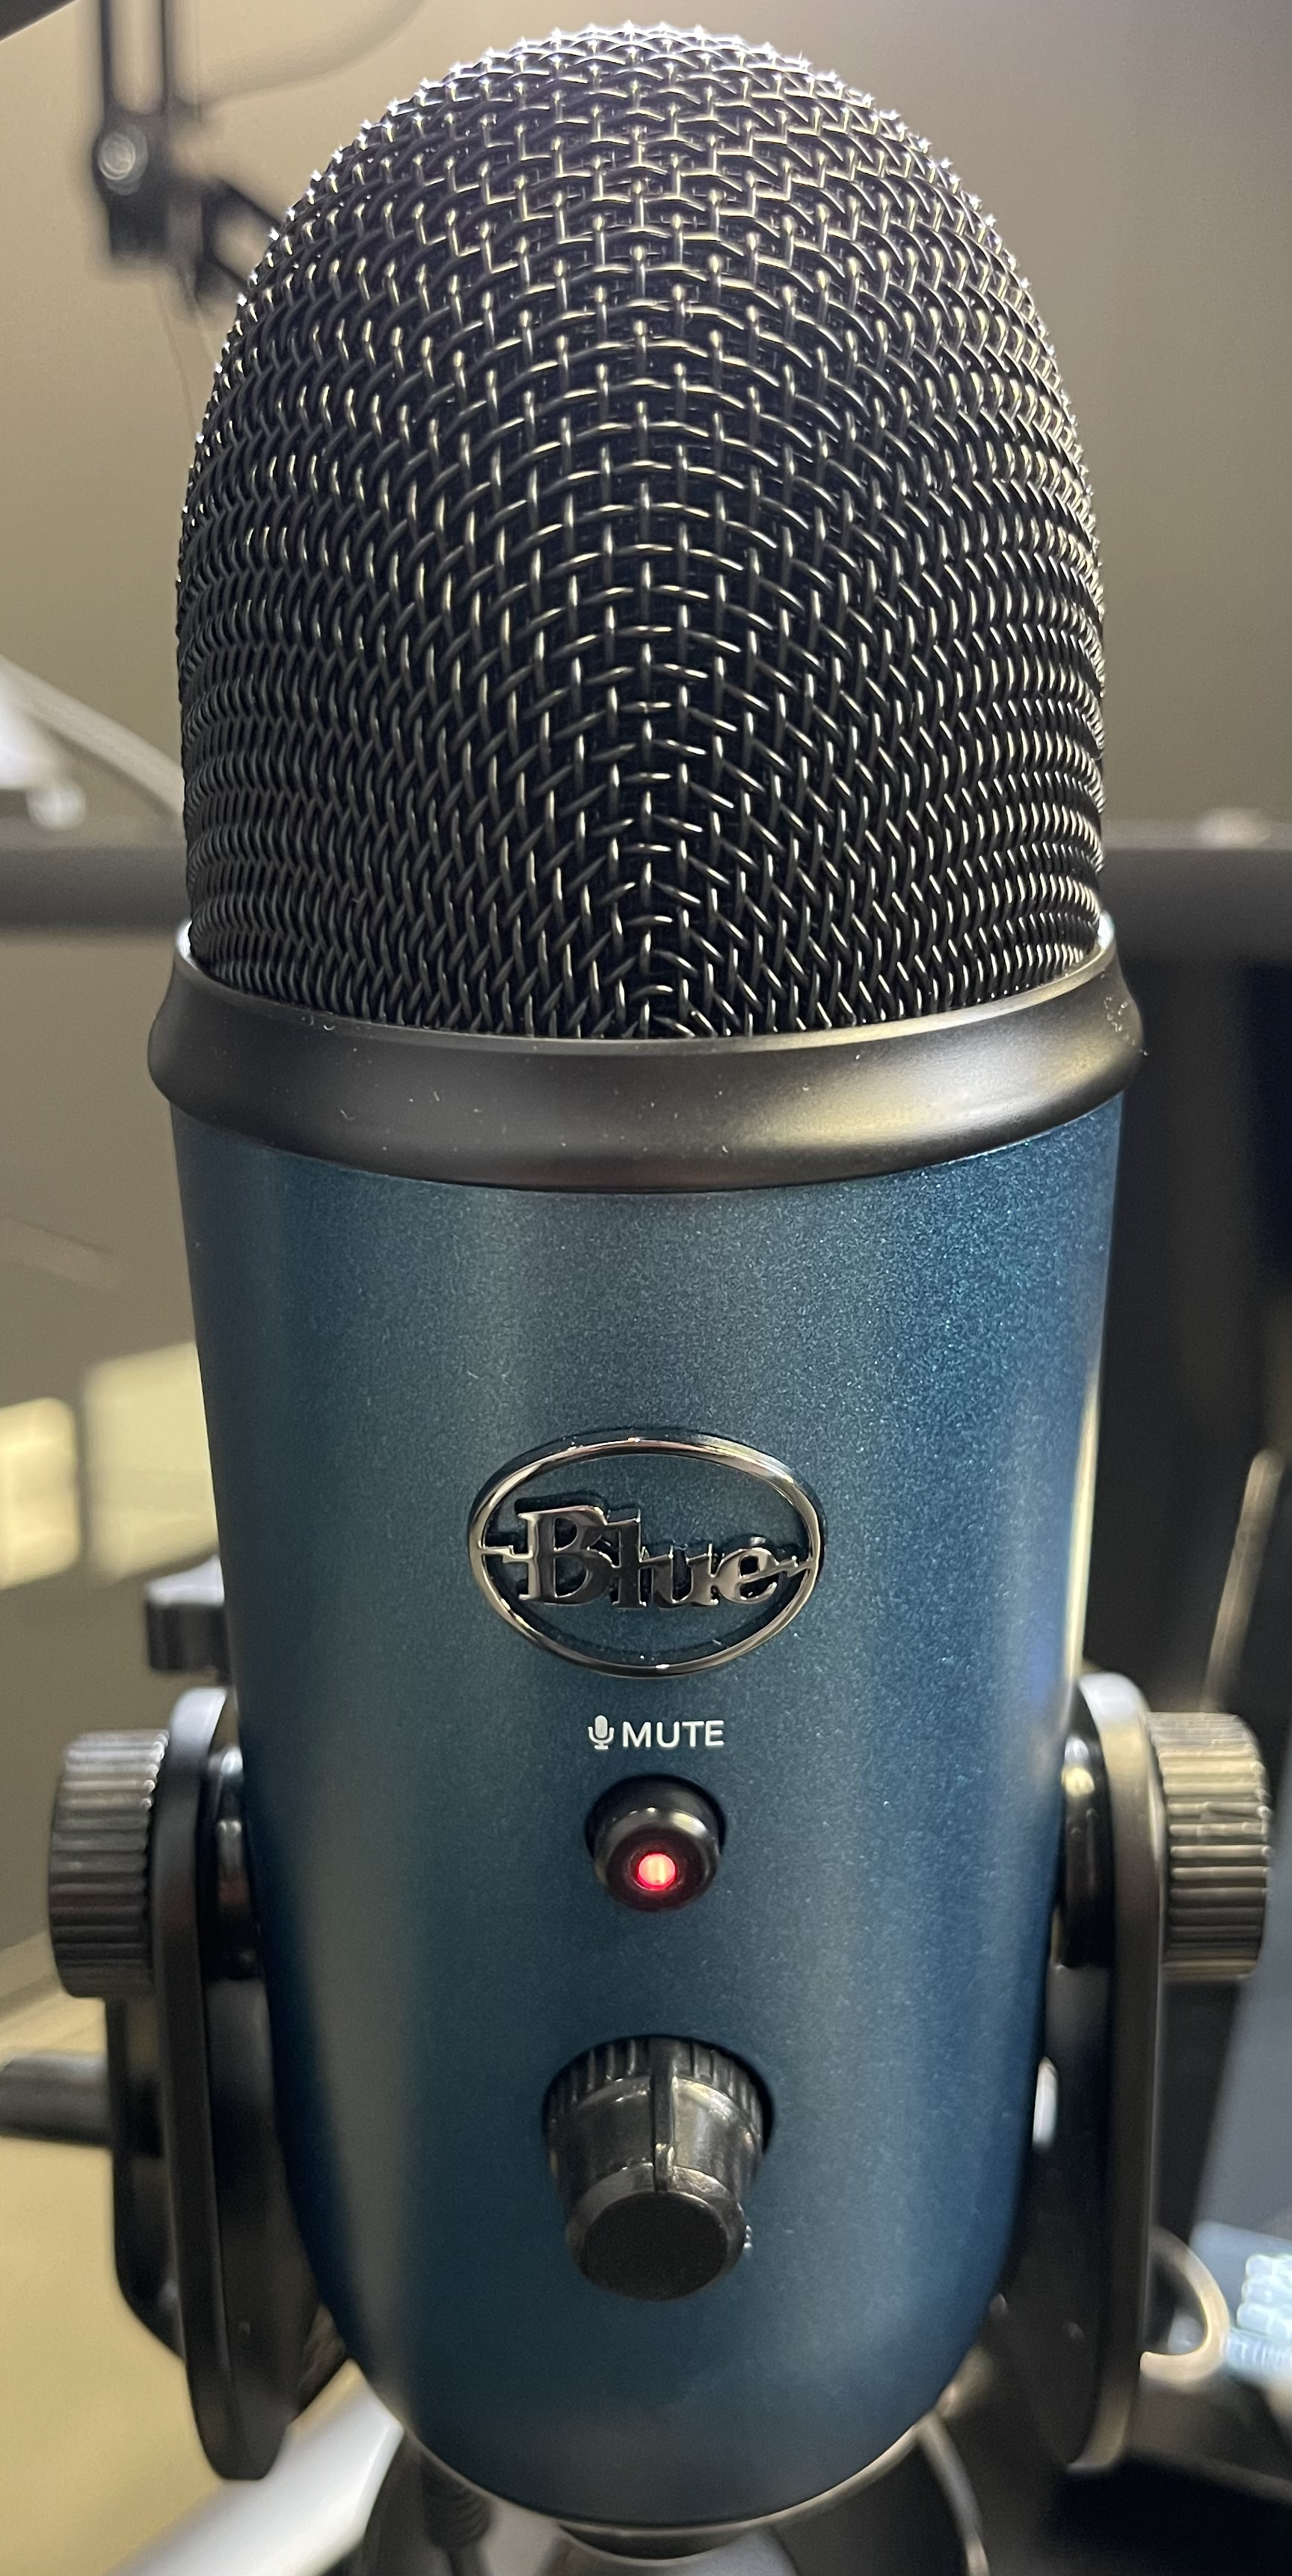
Step 7 - There should be a Blue Yeti microphone on the cart, if you do not see a Red light on the microphone, ensure its USB cable is plugged in the HP USB-C dock.
If you have brought your own USB microphone, make sure it is plugged into the HP USB-C dock.
Step 8 - On the Yeti microphone:
-
- A solid red light indicates the microphone is live
- A blinking red light indicates the microphone is muted
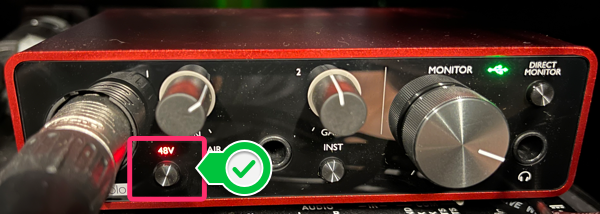
Step 9 - If you want to use the other microphone on the cart, the one that is permanently attached to an extendable arm, confirm the 48v light is lit up red on the back side of the cart.
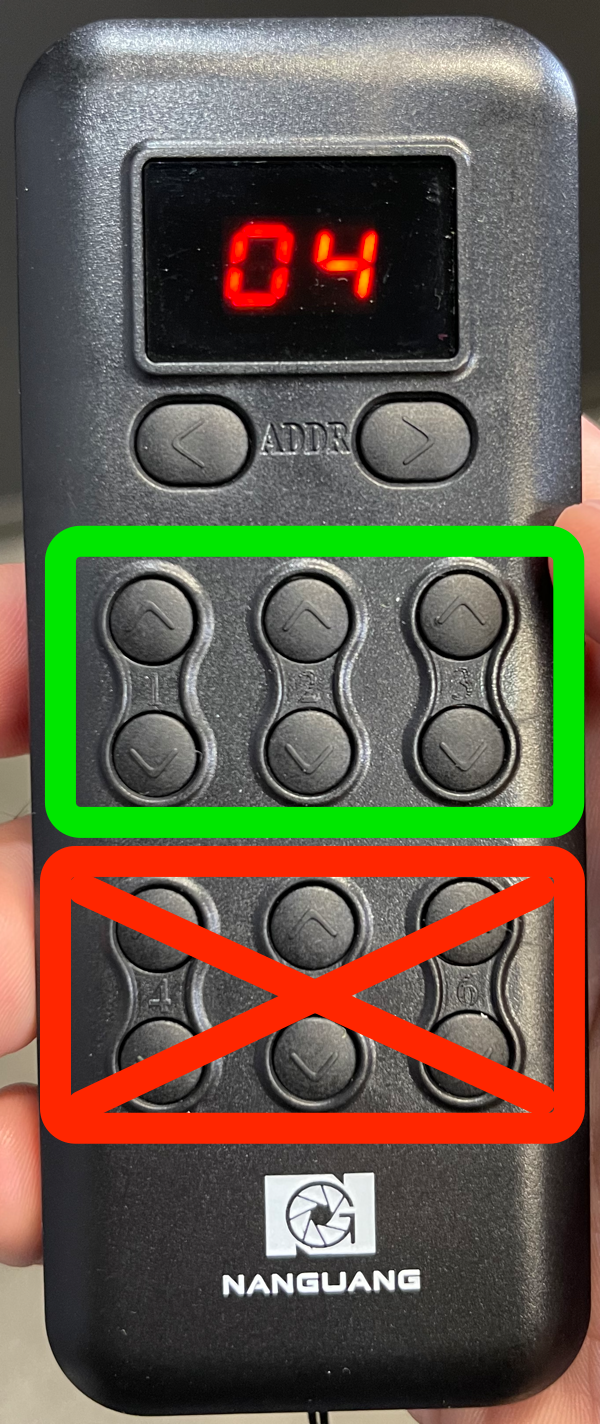
Step 10 - Locate and use the remote below to adjust the background screens:
-
- The top row of up and down arrows (from left to right) controls the white, gray, and green screens.
- The bottom row of up and down arrows is non-functional.
Starting the Recording
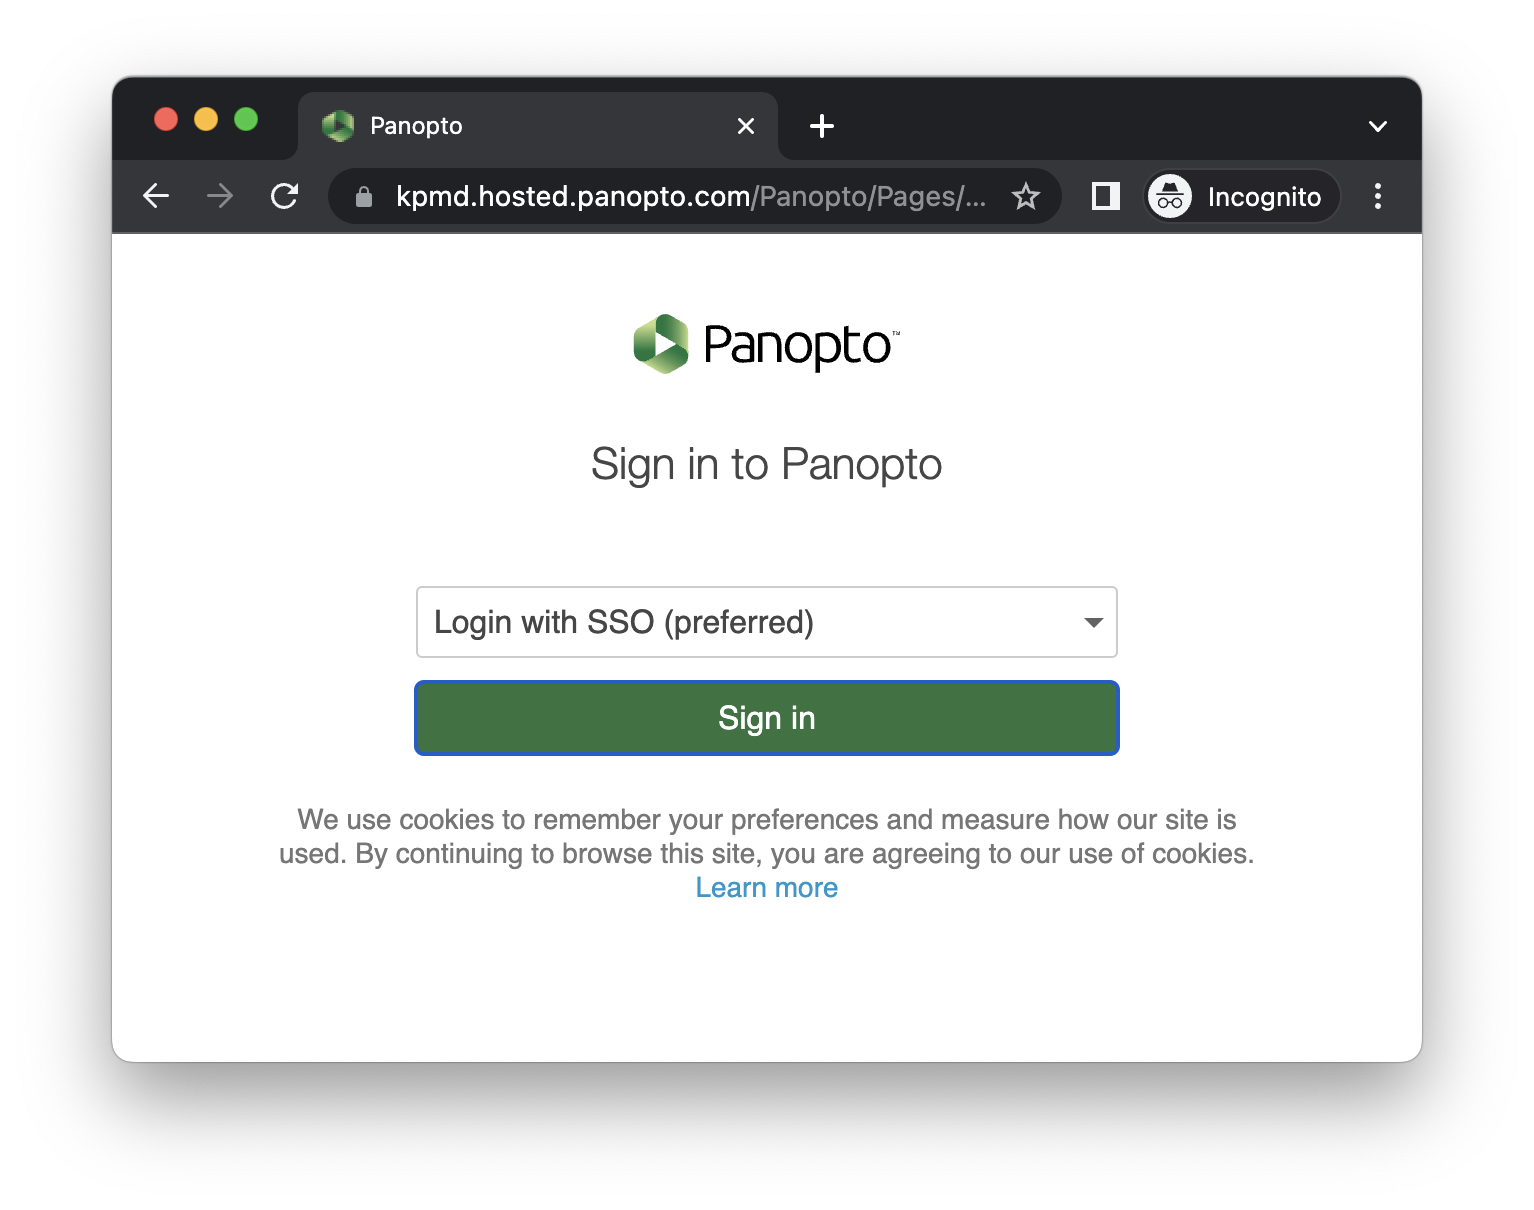
Step 1 - When you’re ready to start recording, open Chrome on your laptop and log in to Panopto (https://kpmd.hosted.panopto.com)
Step 2 - Click Create on the top of the screen and select Panopto Capture
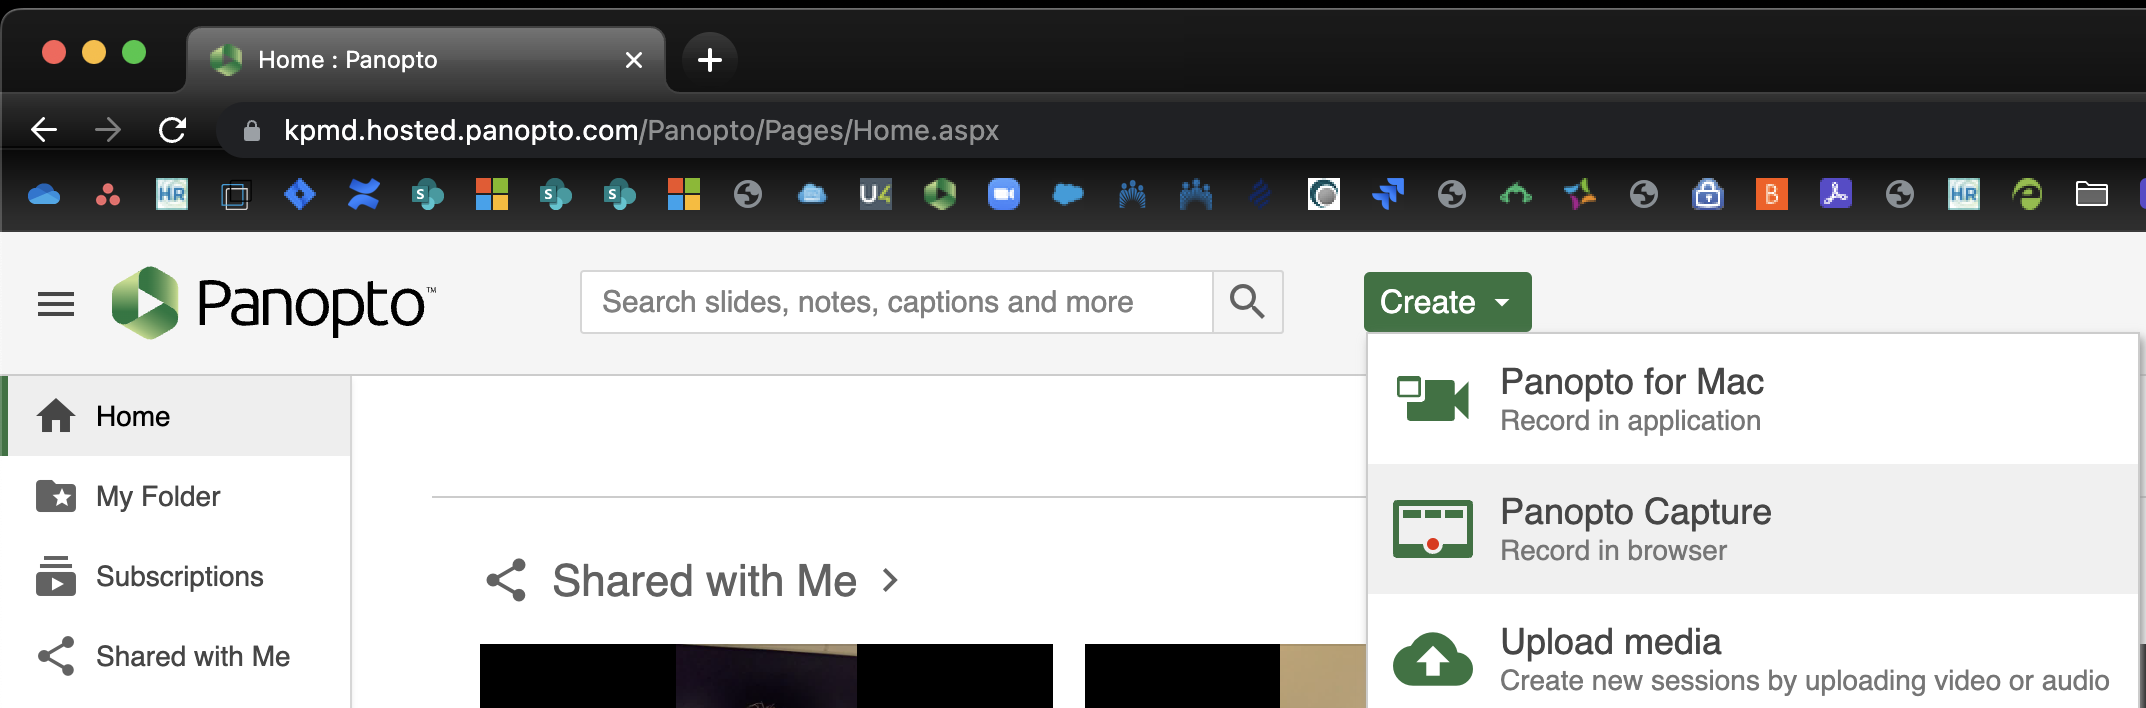
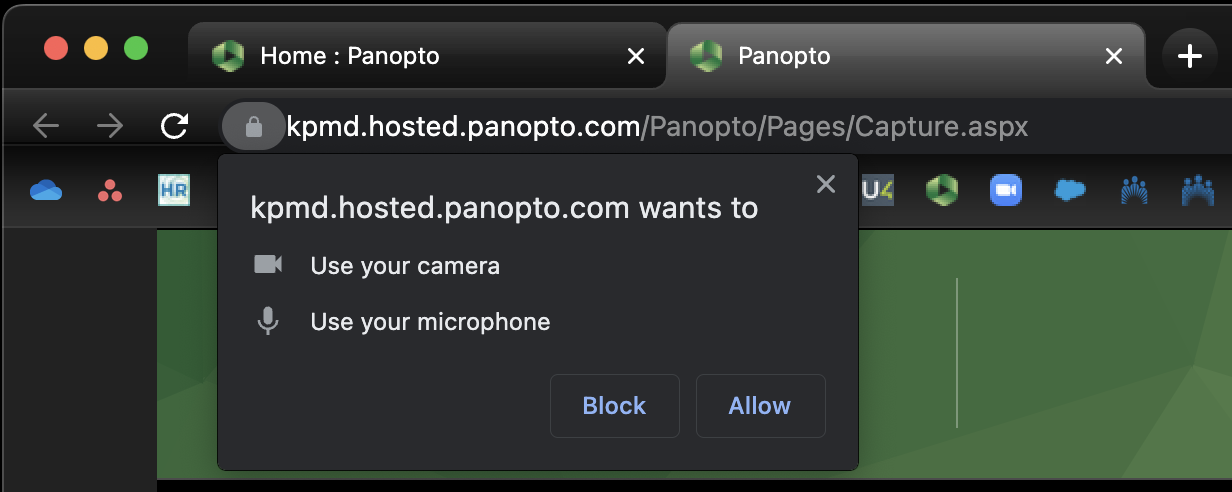
Step 3 - If this is your first time you may have to click Allow in Chrome to enable the camera and microphone
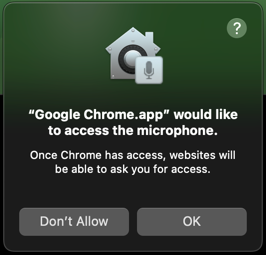
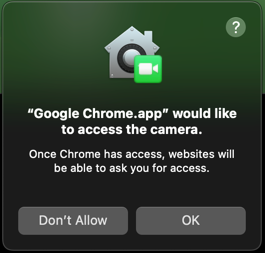
Step 4 - Click OK on any additional permission pop-ups you may see (Specific to MacBooks)
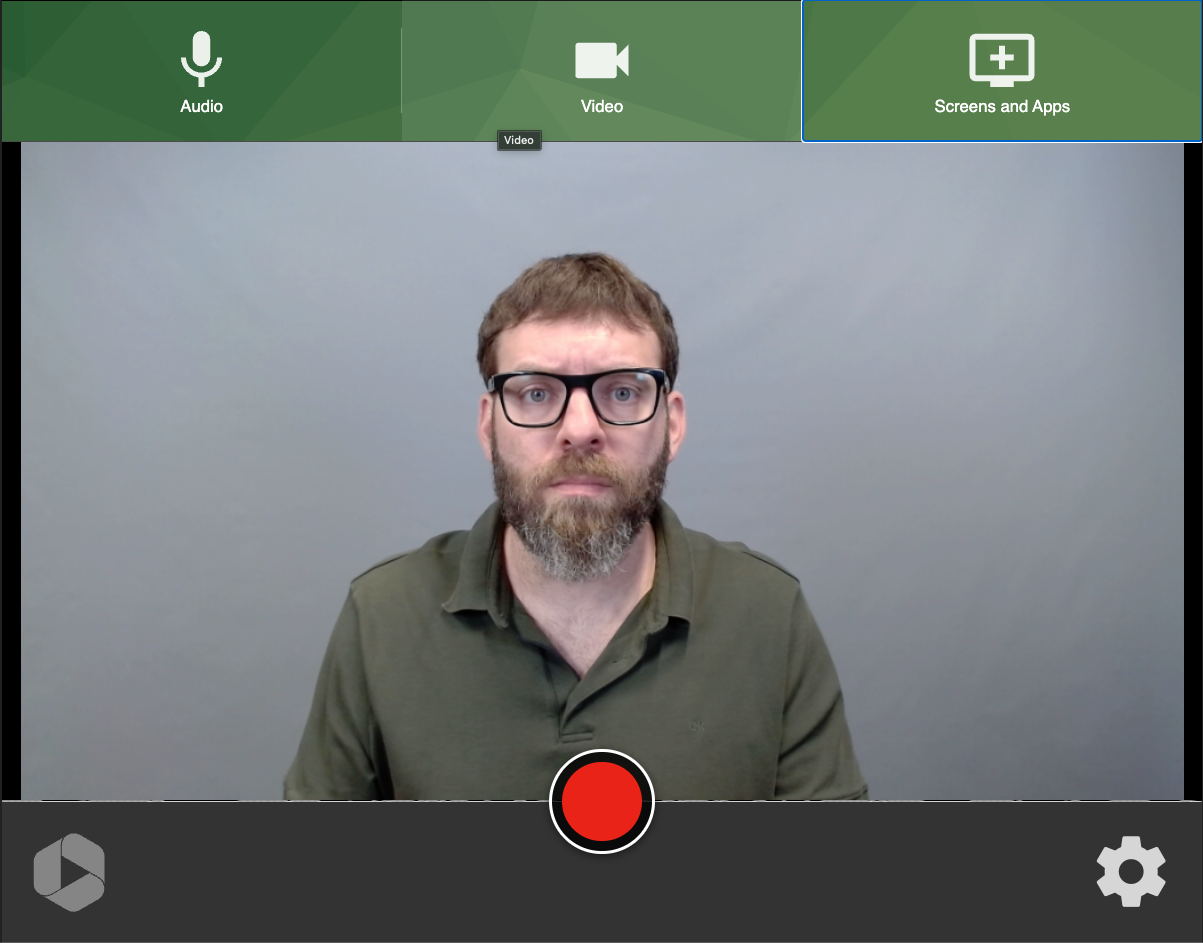
Step 5 - Once through the permission prompts, you will see the main capture screen
First Time Setup - Setting Recording Preferences
The following steps will be required on your first time using the recording studio. These steps will also be necessary if/when your computer is refreshed or if it ever needs to be re-setup from scratch.
Picking up from the previous step...
Step 1 - Click the Audio button in the top left
-
- If you’re using the Yeti microphone, click Switch on the square titled Yeti Stereo Microphone
If you’re using the microphone on the extendable arm, click Switch on the square titled Scarlett Solo USB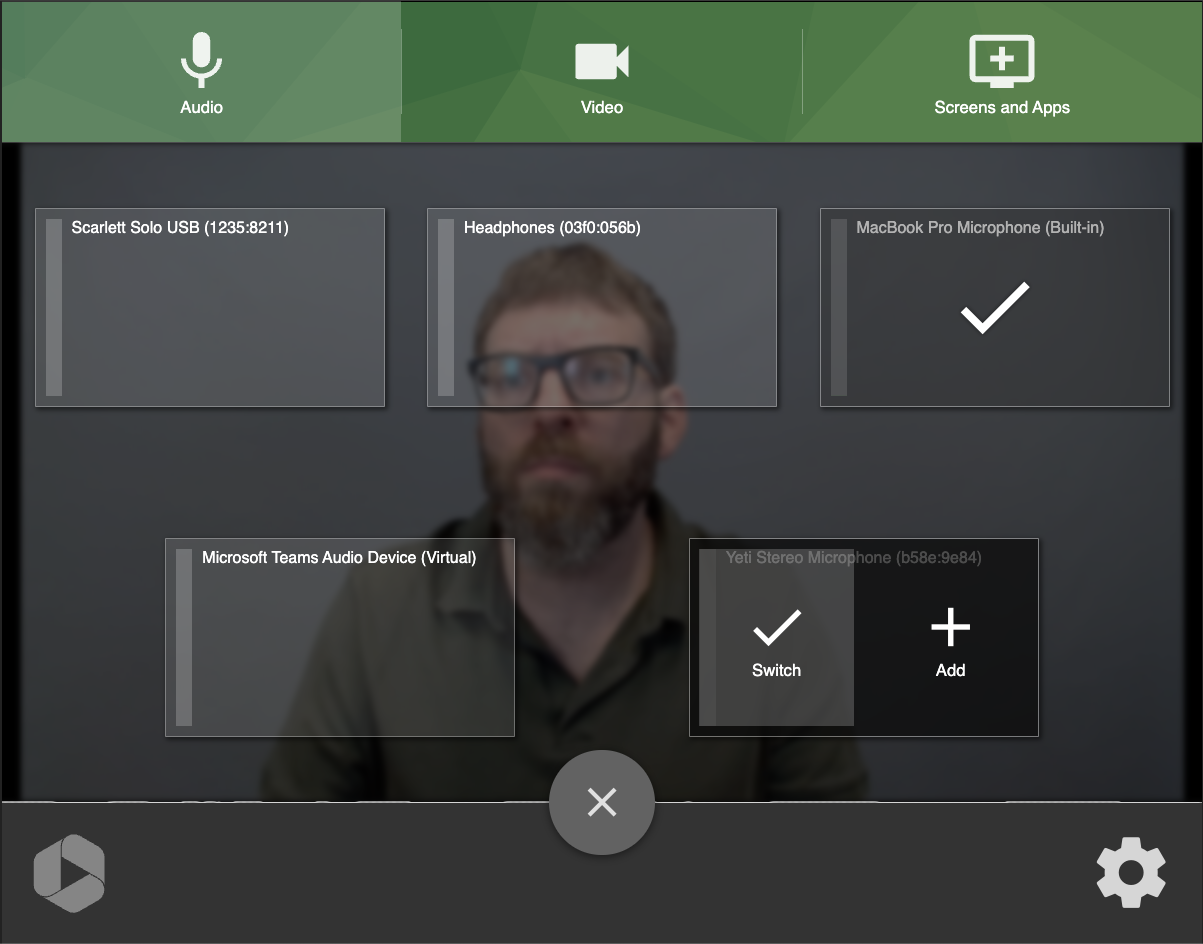
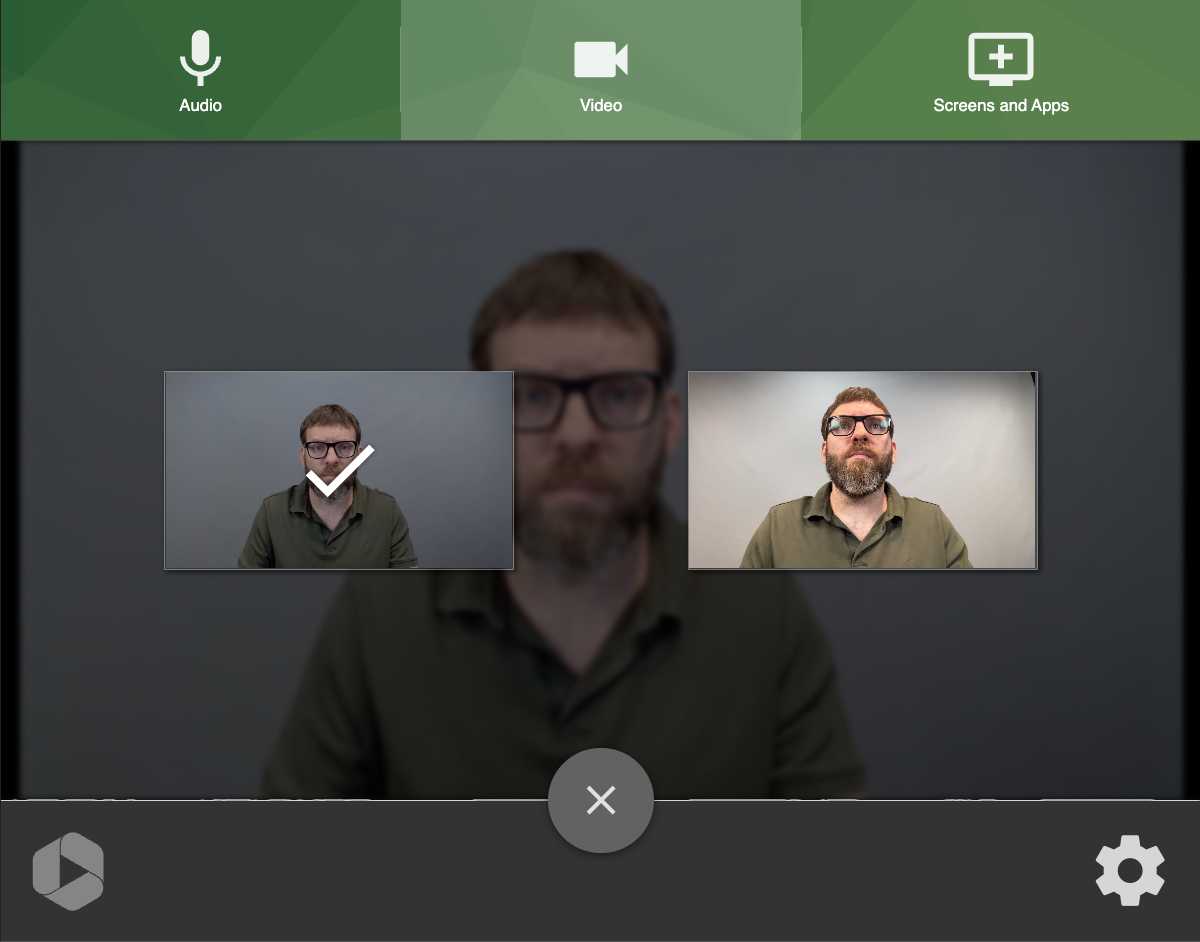
Step 2 - Click Video on the top center to choose your camera, and select the camera that you think looks best (typically the camera you will be looking at during recording)
Step 3 - If you want to show a Powerpoint Presentation, or any other application or content during your recording, click Screens and Apps in the top right corner
-
- If this is your first time you may have to set permission settings by clicking Open System Preferences when prompted (Specific to MacBooks):
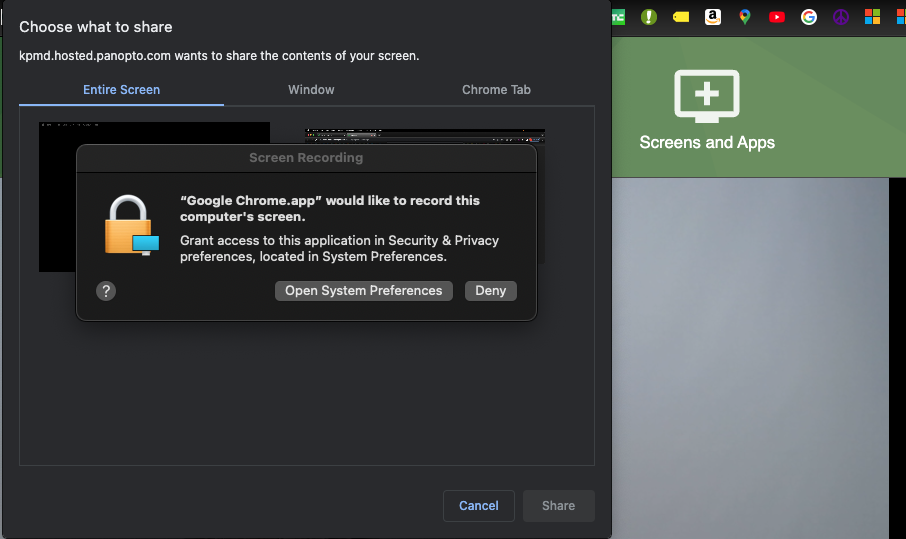
- To adjust the settings, click the lock on the bottom left of the window and enter your password when prompted
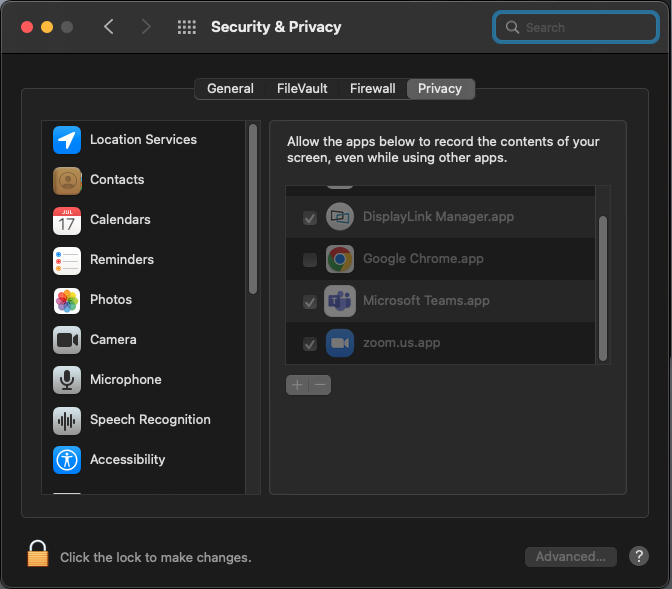
- If this is your first time you may have to set permission settings by clicking Open System Preferences when prompted (Specific to MacBooks):
Check the box next to Google Chrome.app and click Quit and Reopen and start the process again from Starting the Recording (Specific to MacBooks)
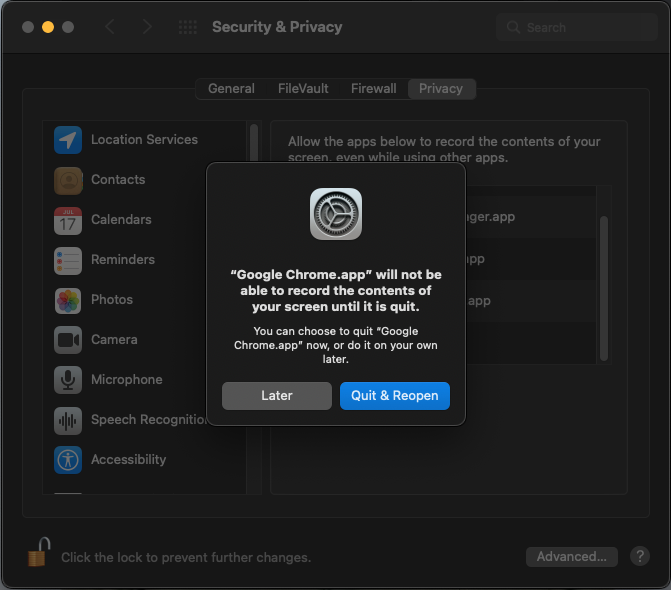 Step 4 - Once you have returned to the Panopto recording screen, clicking Screens and Apps will allow you to show and record specific applications or your entire screen, whichever you prefer
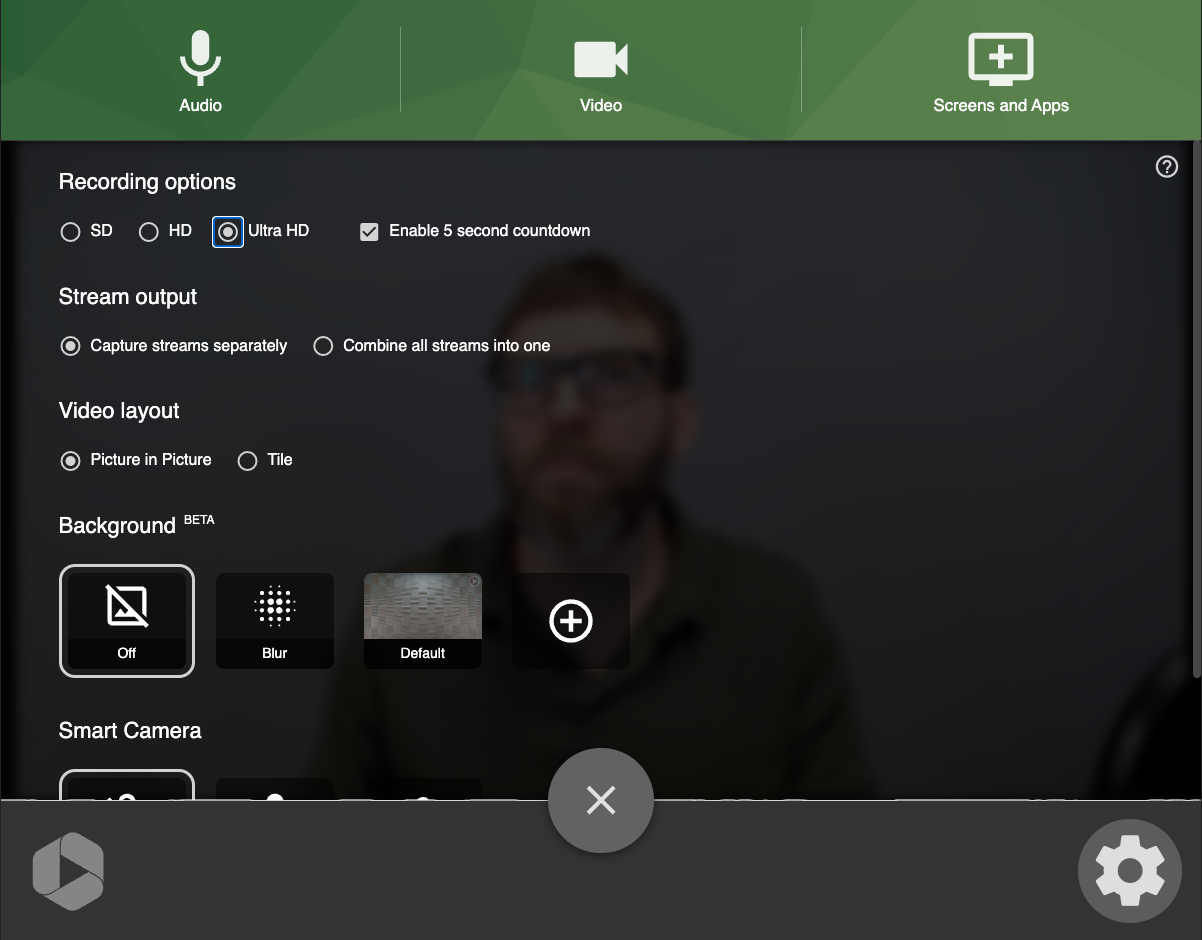
Step 5 - To adjust your recording settings click the gear icon in the bottom right-hand corner. We recommend the following settings:
-
- Ultra HD
- Capture streams separately
- We recommend starting with the default settings, but feel free to experiment with them and find what you like!
Recording and Sharing
Step 1 - When ready to record, click the red record button at the bottom center of the capture screen
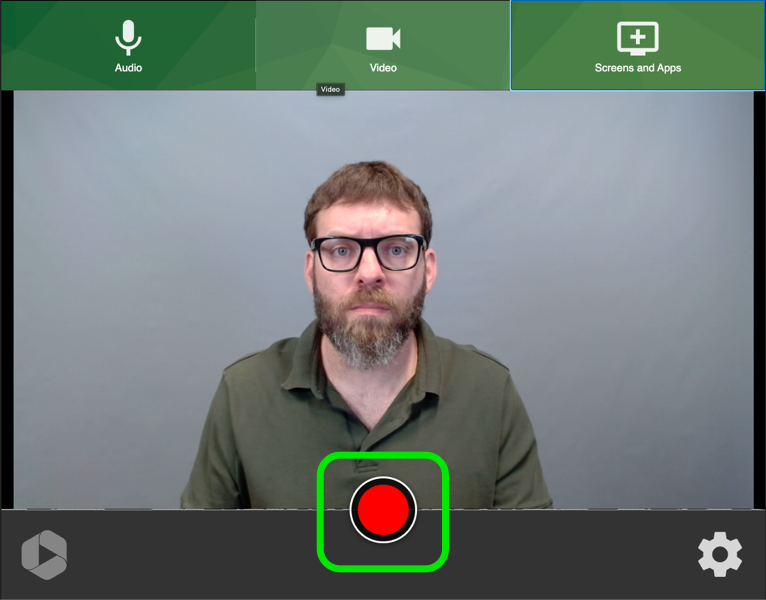
Step 2 - When finished recording click the red square at the bottom center of the capture screen
You will then be taken to the recording details screen
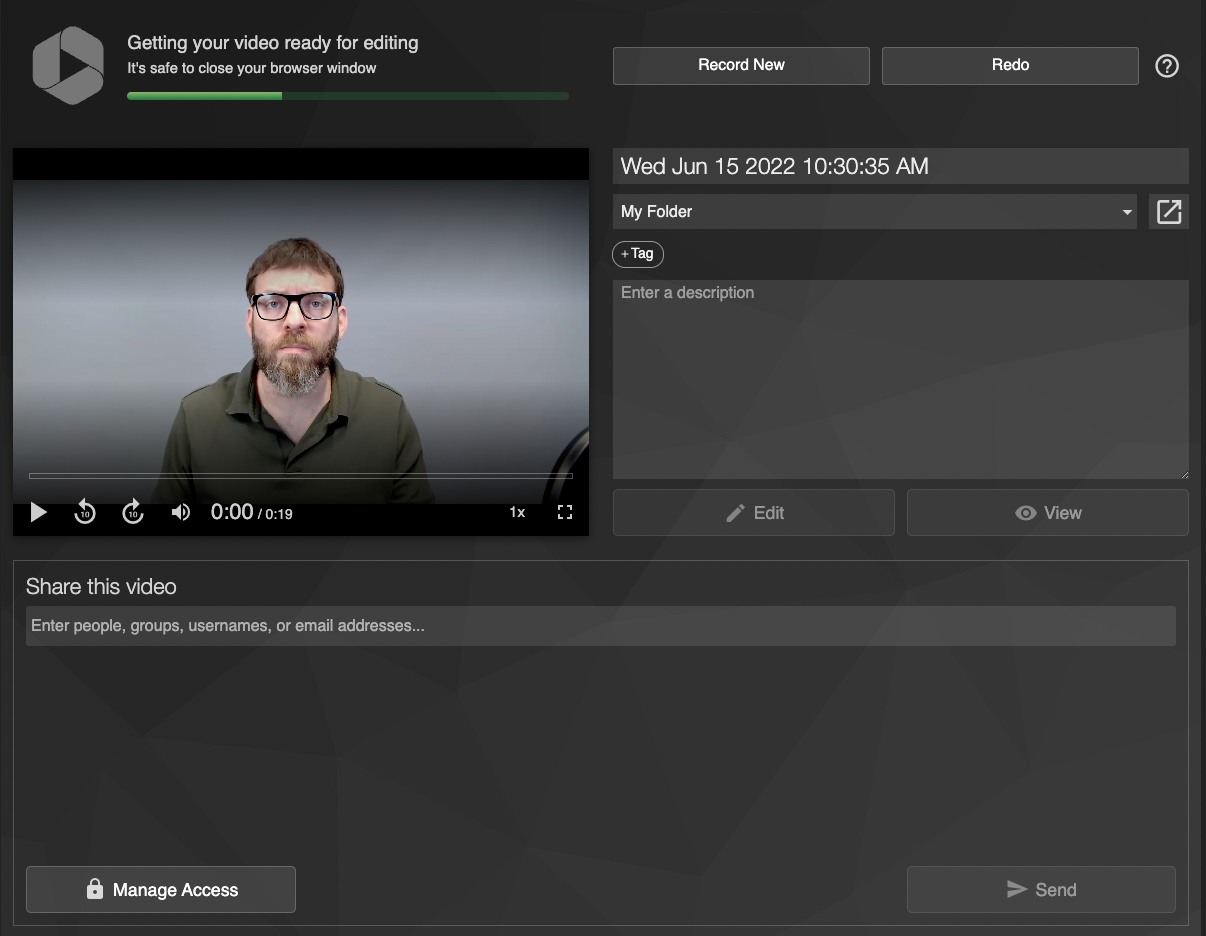
Step 3 - In this screen, you can set the name of your recording, set a description if you'd like, and add any tags you prefer. By default, recordings are saved in your personal Panopto folder and are inaccessible to any non-administrators.
Step 4 - To share your recording with someone at the School of Medicine, type in their @kp.org email address under Share this Video. Those outside of the School of Medicine (including other @kp.org email addresses) may not be able to access Panopto and may not appear as an option.
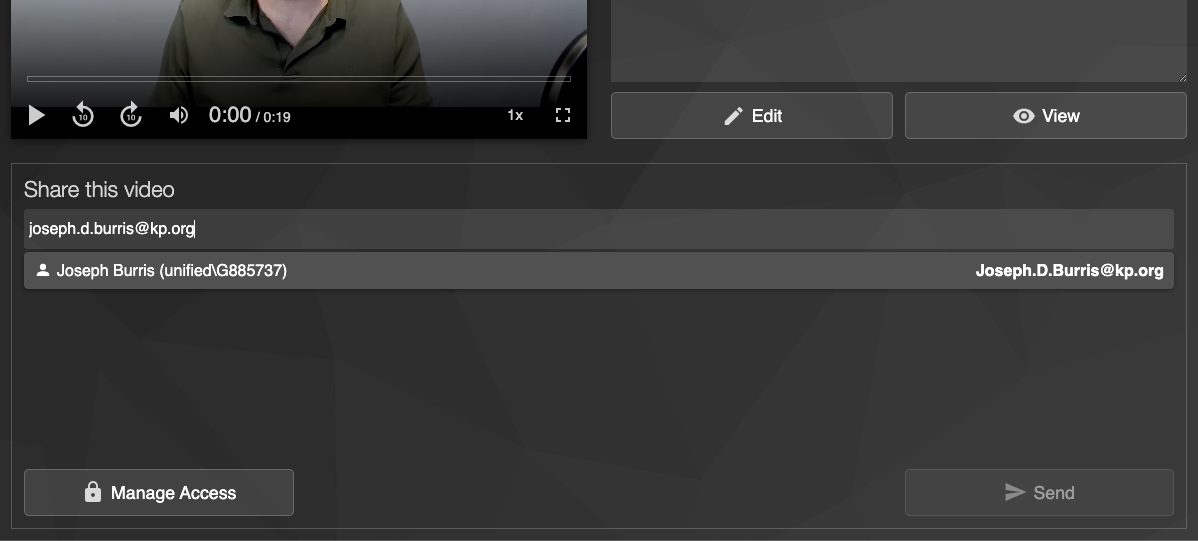
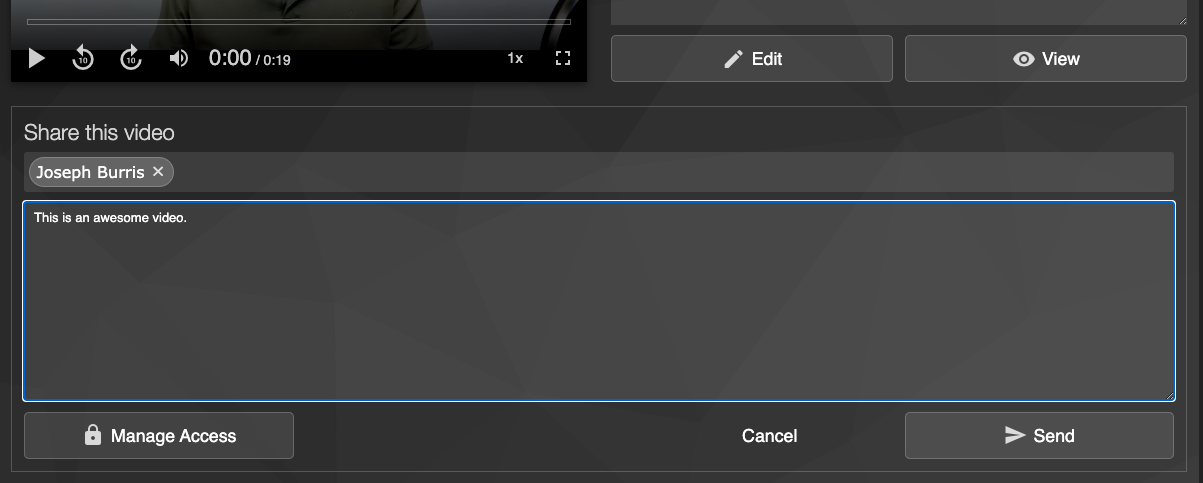
Step 5 - Select your recipient's name from the list, write any message, and hit ‘Send’ when finished
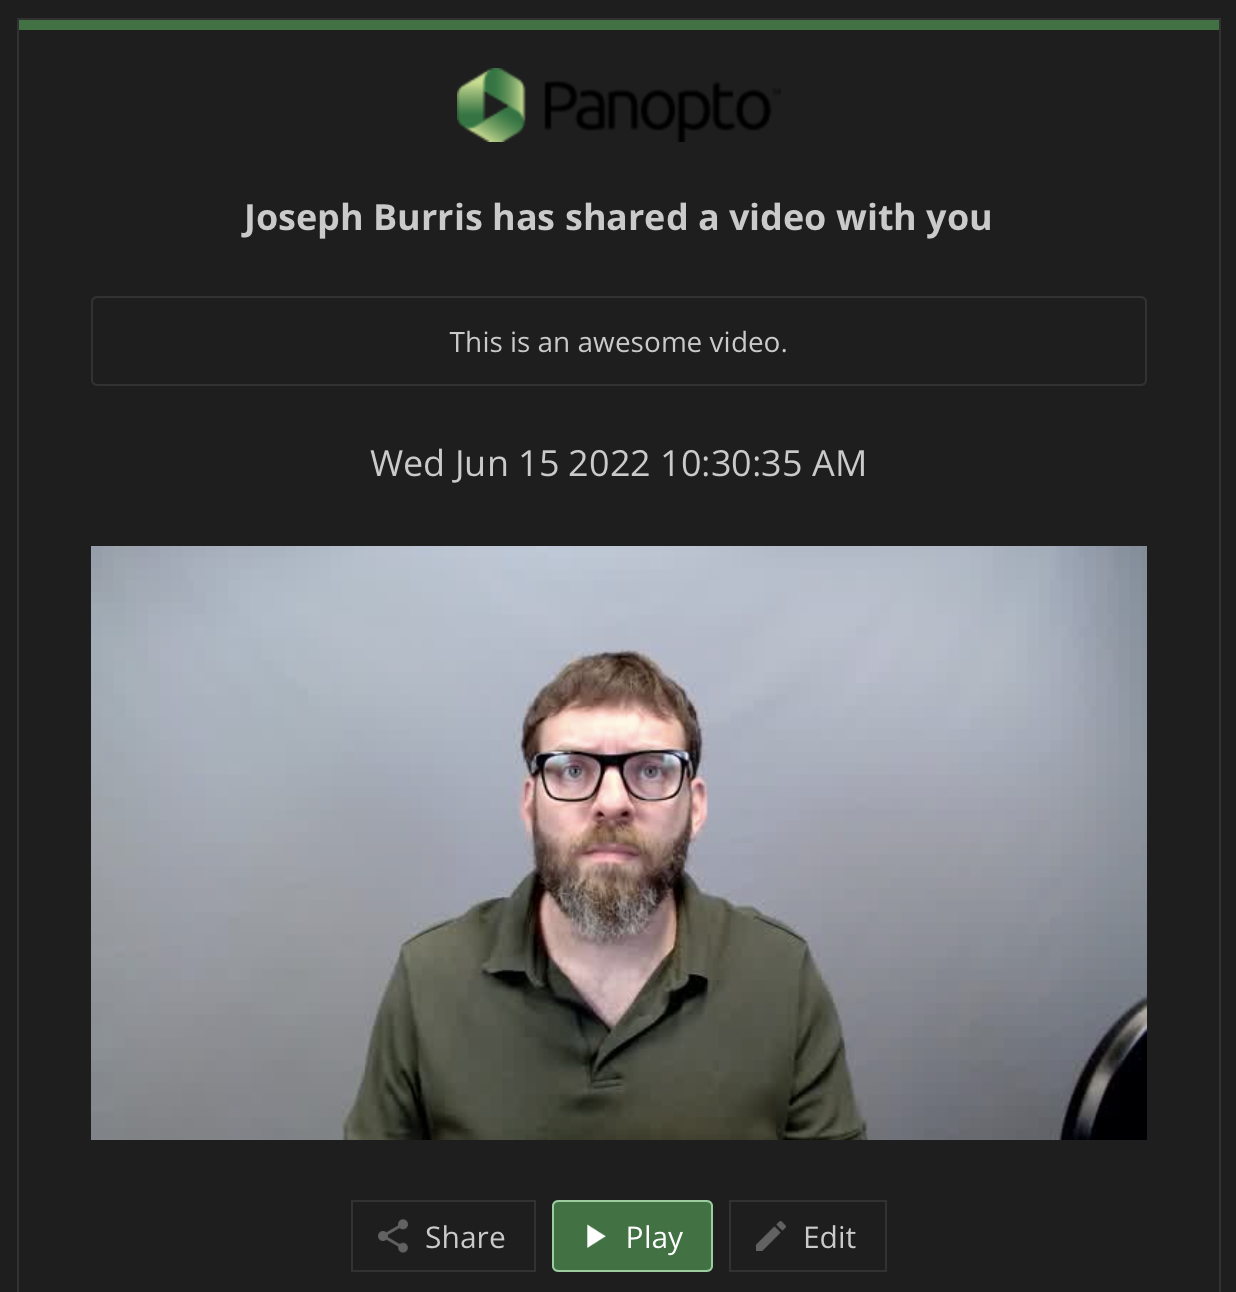
Step 6 - The recipient will receive an email that looks like this
Managing Sharing through the Panopto web interface
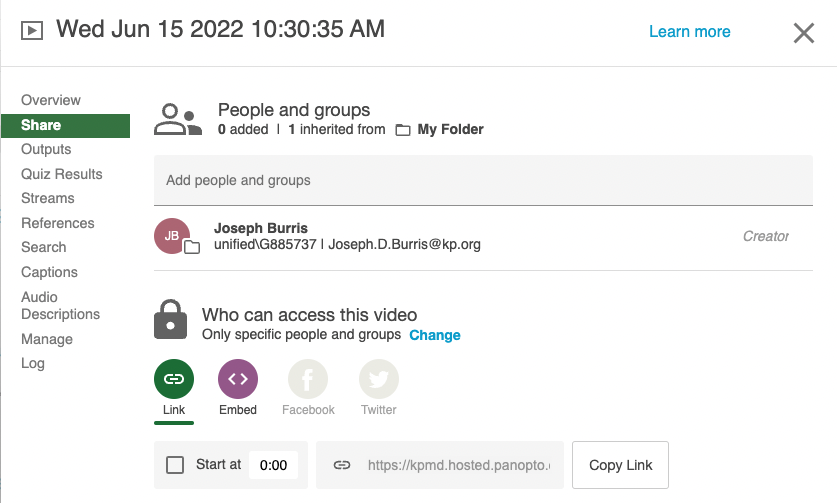
Step 1 - Find your video in Panopto by clicking My Folder and click on Manage Access link
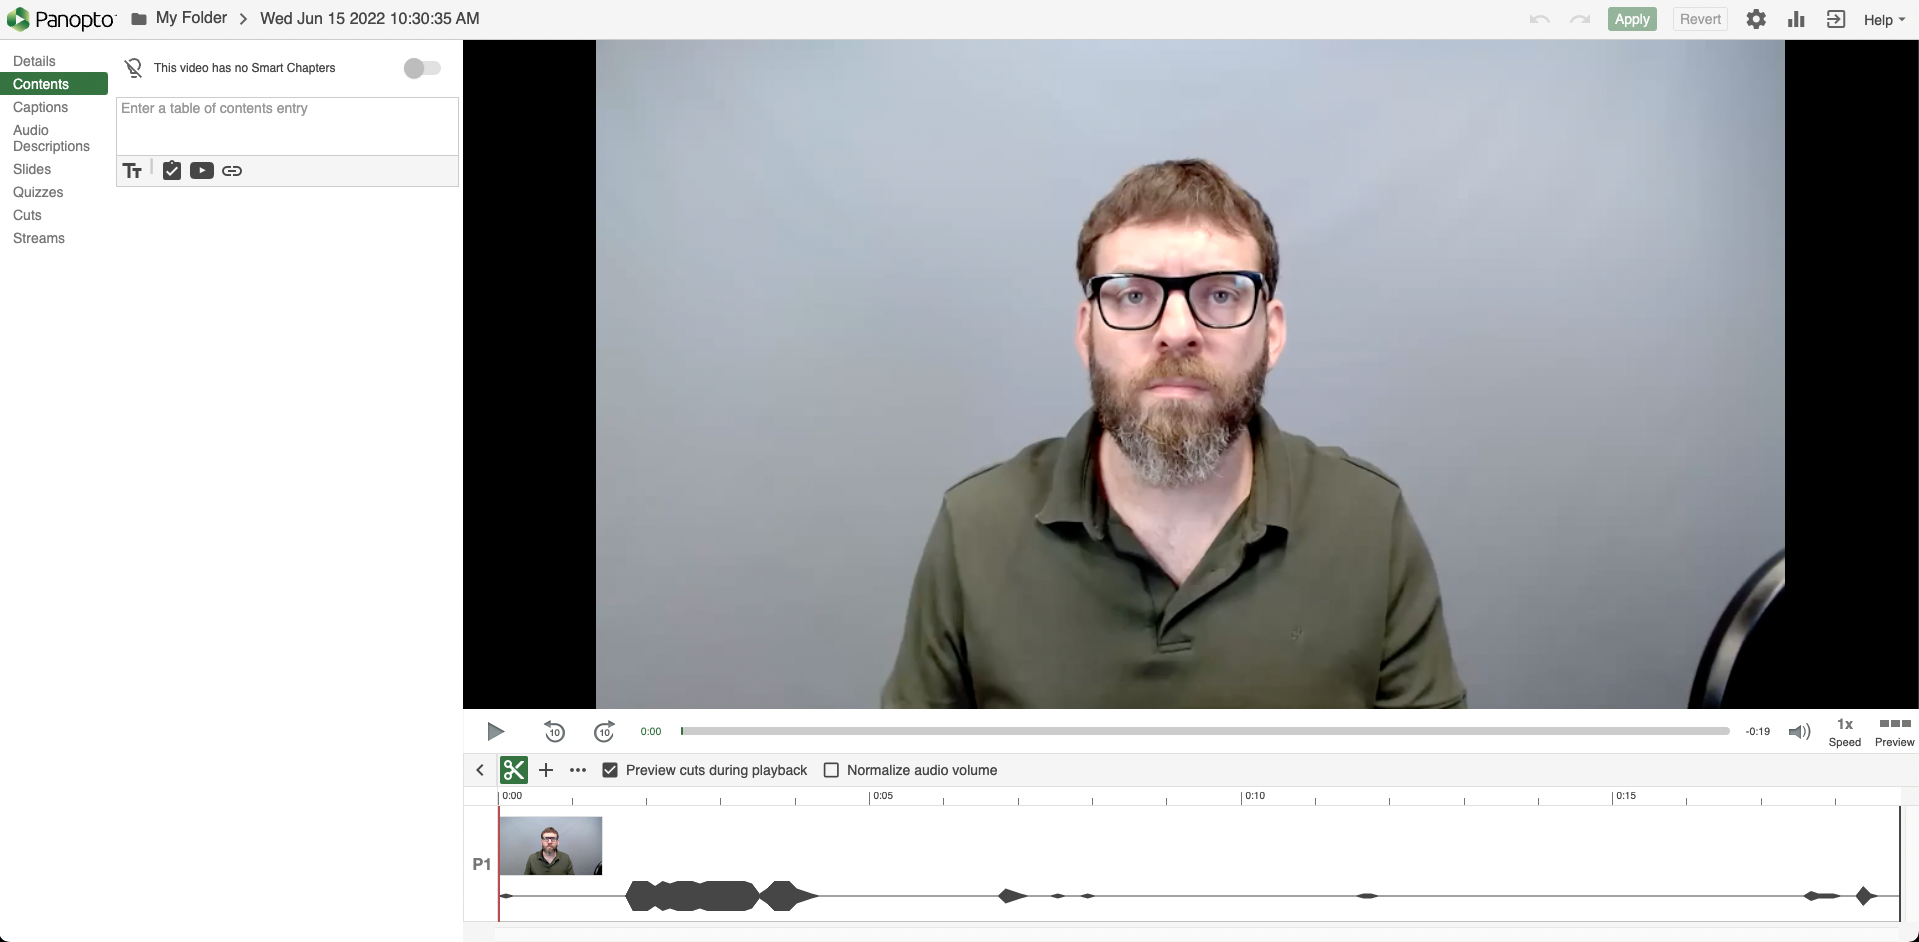
Step 2 - Clicking the Edit button will lead you to the standard video edit screen.
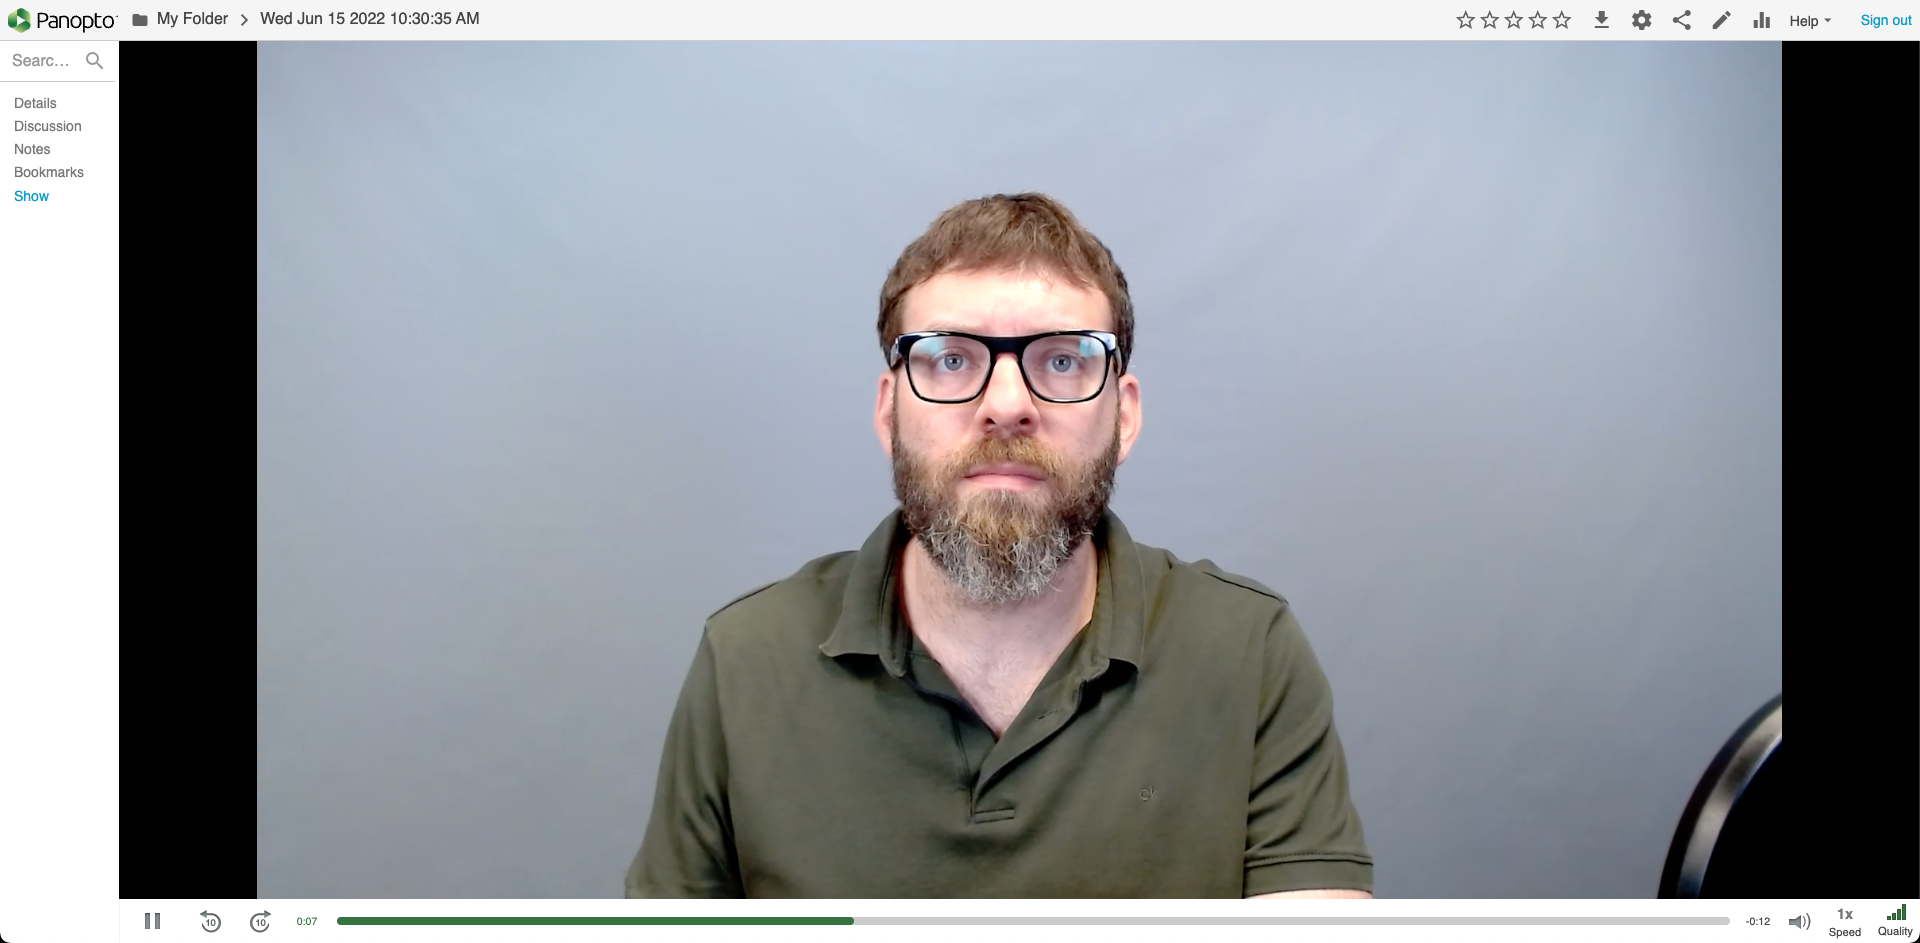
Step 3 - Clicking the ‘View’ button will lead you to the main video screen.
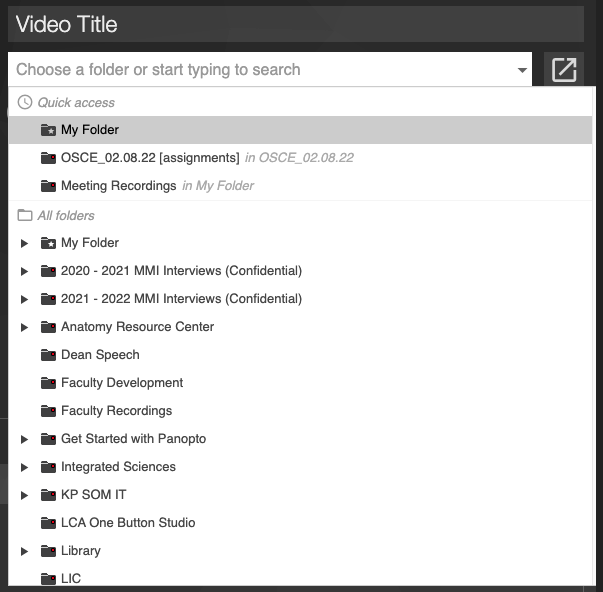
Step 4 - To change the video title, edit the blank containing the date of recording.
You can also save the video to another location using the drop-down menu under the video title:
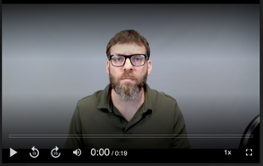
Step 5 - You can preview the video in the main screen.
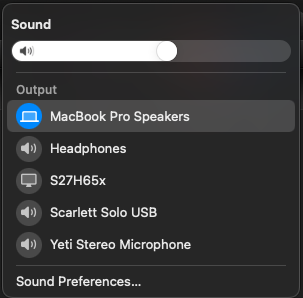
Step 6 - If you don’t hear any sound, check your sound output settings. (Example from MacBook)
Comments
Please sign in to leave a comment.